- Instructor quick guide
- User quick guide
- Course quick guide
- Grading quick guide
- Group choice quick guide
- Attendance quick guide
- Quiz quick guide
- Quizventure quick guide
- Assignment quick guide
- Word count quick guide
- Gamification quick guide
- Report Builder
- Generated Report
- Learning Path
- Roles and permissions
Contents
3 Course Grades and Other Course Reports
6 Department Segregation (Multitenant)
Reports
Reports are an essential part of your LMS. It was built to make it easy to draw out information from all over the platform and see the interactions your users have in your platform.
LMS comes with some built in reports that bring several data from all over your courses.
You have your reports menu with 5 categorizing items for very report available:
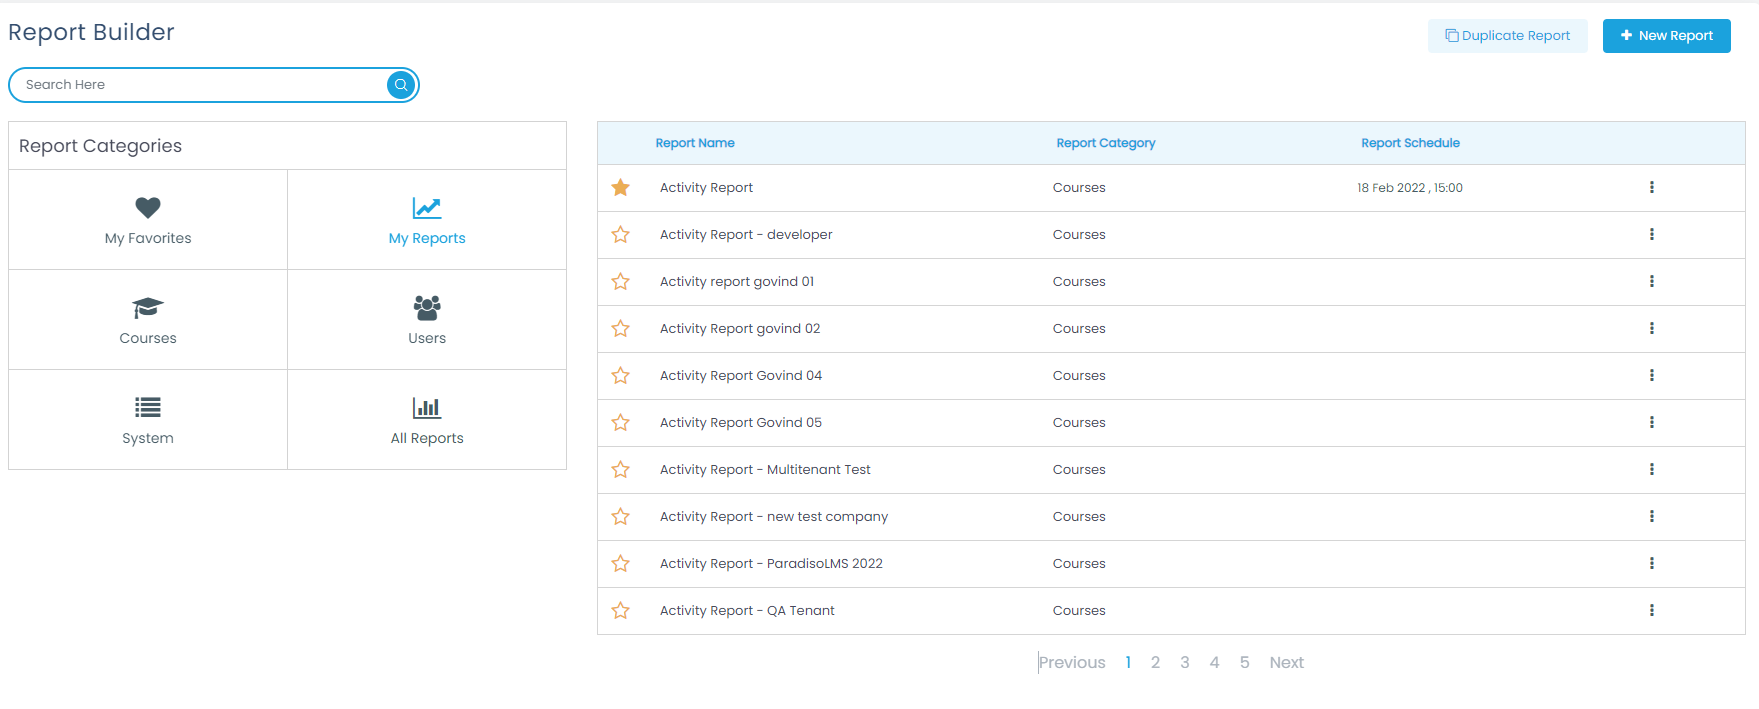
- My favorites: as the name suggests is where you can keep your most accessed reports. You can add or remove them to this tab by clicking on
 or
or icon to the left of the report to tag or un-tag as favorite.
 - You have your Courses reports which are to draw data from your courses. Some examples are Course overview, Most popular Courses by enrollment and Views, Quiz overview, Video Reports
- Users reports are to learn about your users and their platform usage like logins per day, total users, etc.
- System reports are for data more related to your platform usage, like traffic and maybe platform engagement.
- Search bar which is basically to search within your reports per name.
Note: To create your own report, click on the upper right “New Report” button.
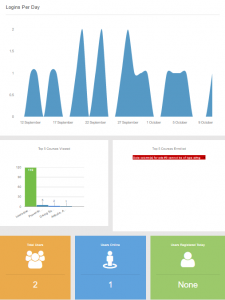
You will also notice that this report page shows some graphics which are the most requested pieces of information from our platform:
Any built in report has the capability to help you find the data that you need. If we visit one of these reports (and depending which type of report you are looking at) you can add/remove filters, columns, dates, courses, etc. Here is a brief overview of elements available in most of your reports:
- Add Filter button: When you click on this button you will have an assorted list of filters to add to your report and trim down to find exactly what you need. These filters vary depending on the type of report you are running so you will likely find different reports available for Course reports than from Users reports.
- Schedule Report button: You can schedule a set time to run your reports. We tried to make this as easy for administrators as possible so when you click on this button you will be presented with a scheduling wizard tool, that will guide you step by step on how to set up your scheduled report.
- Settings button: This button has some basic functions that affect the report you are looking at directly. Keep in mind that depending on the type of report you are viewing, these options may differ or not even show at all or show less available.
- If you look closely into your reports at the top left side of each report you will see this drop down icon. With this icon you can easily control what’s visible in the report you are looking at by allowing you to hide/show columns (Keep in mind these columns are specifically to the report. This means you cannot show columns that have not been added to the report already.
Add Report
To create a report with all the information you want to include, you can follow the next steps.
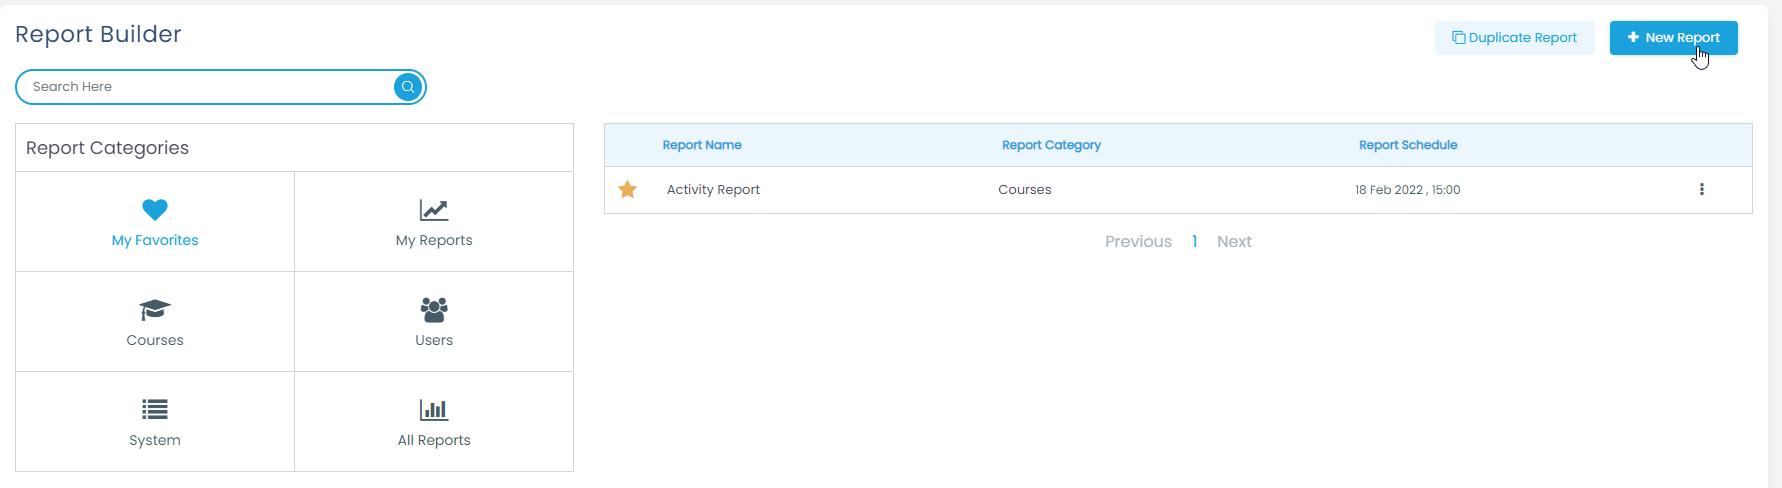
From your home page, you can click on the left menu on the Get Reports button

Click on the upper right “New Report” button.
A new page will show up showing the three stages of the Report Creation:
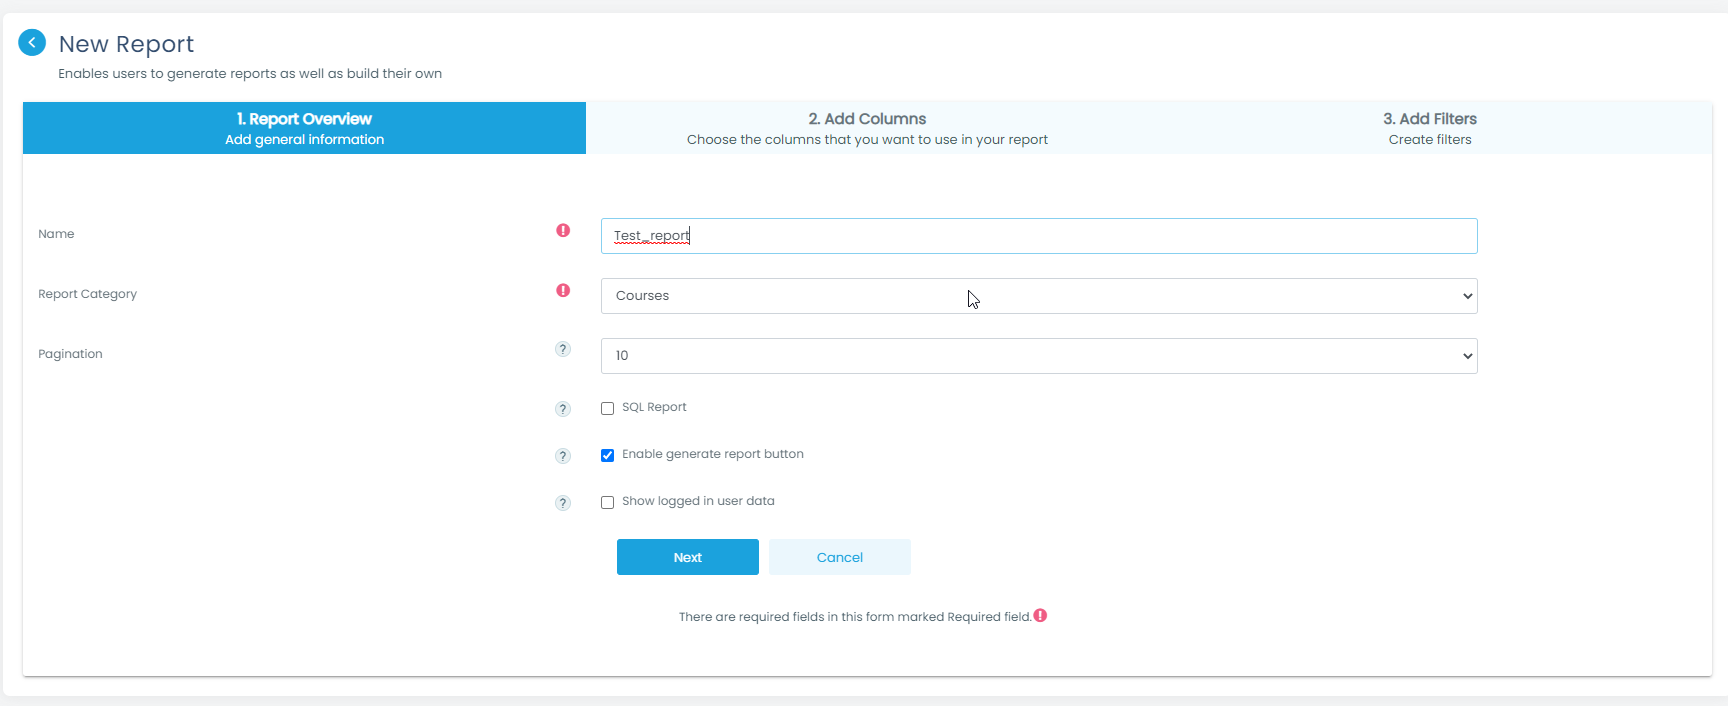
Report:
Here, is where you will fill in the basic information for your report:
- Name: type in the name you want for your report.
- Category: in the drop-down menu, you will find the different categories in which you can place your report in.
- Number of records per page: you can choose the number of records per page you want in your report from 1 to 100.
- SQL Report: enabling this option will allow you to have the report in SQL code. This option is for advanced users as ti requires code knowledge.
- Enable generate report button: if you want your report to have the option to be able to be downloaded as a CSV file, it is necessary to enable this option.
- Show logged in user data: enabling this option will include the logged in user information.
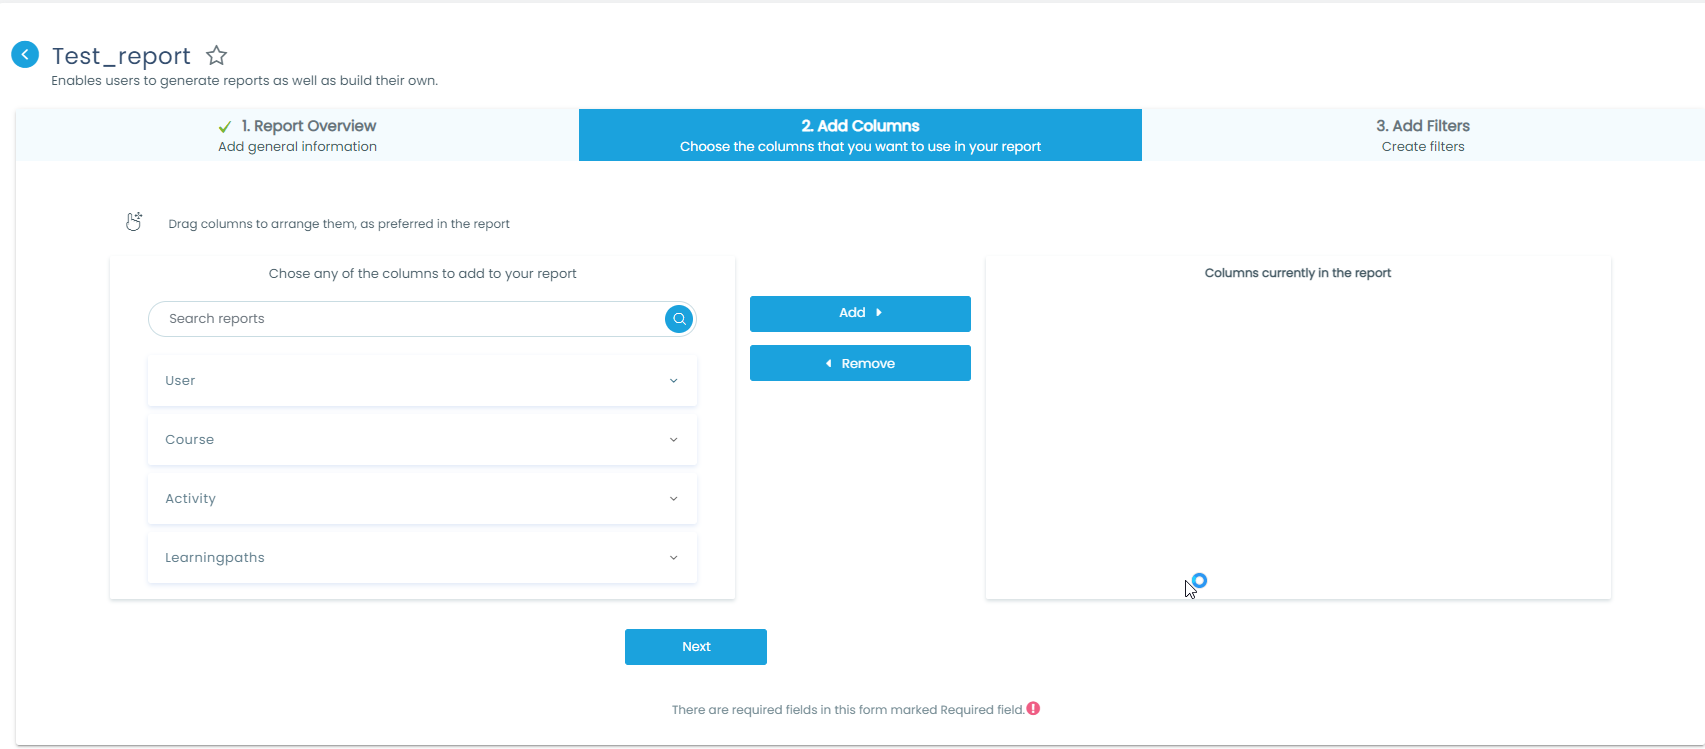
Columns
Here, you can choose the columns that you want to use in this report. To select them:
- From the left side, choose the objects on each category that you want to add to your report.
- Once you have them selected, you can click on the Add button for the selected ones to be moved to the right text field. You can also select them and drag them to the text field.
- When you have them arranged in the order you want them to be shown in the report, click on Next button to continue.
Filters
To choose the columns that will be included in the filters, click on the Add Filter button that you will find on the upper right corner. The next screen will pop up.
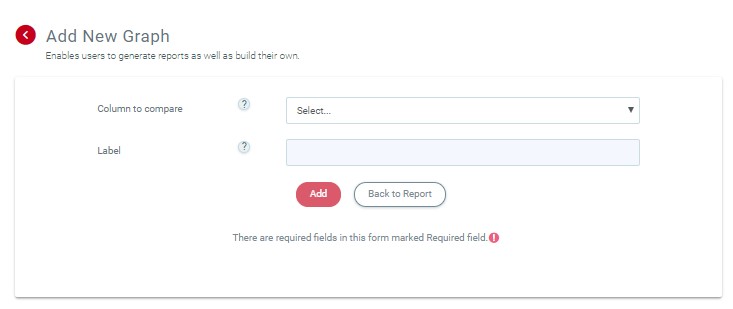
You can select the column to compare in your report.
To finish, click on “Back to report”. A new message will be displayed, and you can click “finish” button to end up the creation of the report.
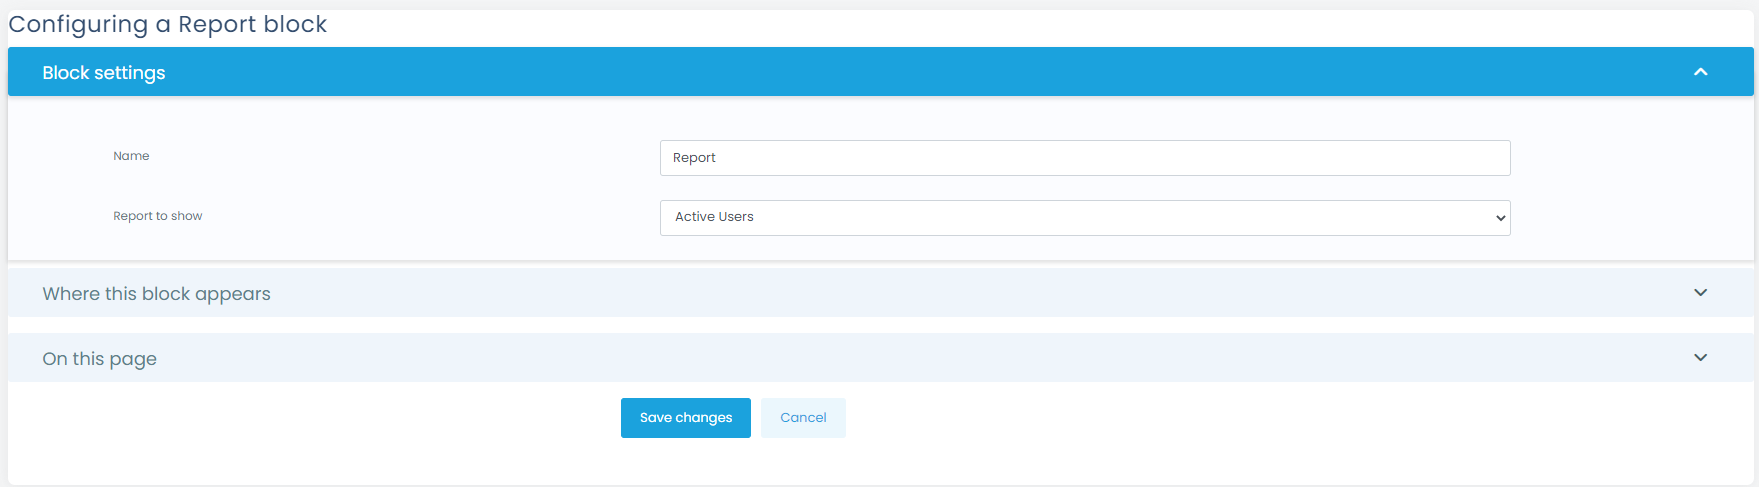
Reports View
Reports Views allows the Admin / Managers to embed a report into a block. To do so, follow the next steps:
- From the Home page, turn the “Customize this page” on, and click on “Add Block” button.
- From the list, click on “Report view”
- Once the block is added, click on the gear icon and select the option “Configure Report views block”
- Select the name the block is going to have, select the report you want to embed, and click on “Save changes”.
Save and Save as
Save and Save as are new options inside the reports, that will allow you to save the information you fill in the Report’s filters in the same report (Save), or duplicate it as a new Report (Save as):
- Open any Report that has existing filters.
- Filter the report by any criteria you need. (e.g. by course or tenant).
- Click save or save as.
- “Save” to save these filters on the actual report.
- “Save as” to save the segregated report as a new report.

Department Segregation (Multitenant)
If you add the Reports Capability to Department Managers, those reports are now segregated by Departments.
In addition to that, there is a new Report column called “Tenant Department” allowing the Super admin or Main tenant manager to filter reports by Tenant and Tenant Department.