- Admin quick guide
- Instructor quick guide
- User quick guide
- Course quick guide
- Grading quick guide
- Group choice quick guide
- Attendance quick guide
- Quiz quick guide
- Quizventure quick guide
- Assignment quick guide
- Word count quick guide
- Gamification quick guide
- Report Builder
- Generated Report
- Learning Path
- Roles and permissions
Learning Path is a set of materials that are taken gradually according to an individual pace of learning.
Contents
1 Create a Learning Path
2 Add Courses, Set prerequisites and Required Courses
3 Adding Removing users and Cohorts
4 Learning Path Self Enrollment
5 Learning Path Dashboard
6 Notifications
7 Certificate Content
Create a Learning Path
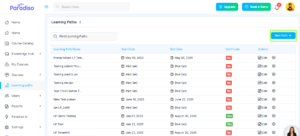
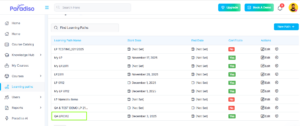
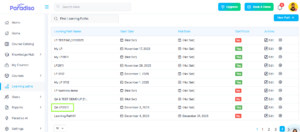
Step 1: Go to the left-side navigation bar and click on Learning Path.
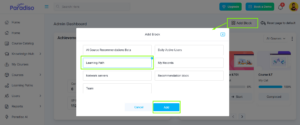
Step 2: Click on New Path button on Learning Path and create a learning path form will appear.
Step 3: Fill in the following details in create a learning path form:
- Learning path Name: Enter the name of your Learning Path
- Credits: This determines the number of credits required to complete the Learning Path. Credits are giving by courses (via Course Properties). This field is optional, if you don’t want your learning path to have the Credits condition, you can keep it empty.
- Start and End Date: Enable the start/end date options if you want to set specific dates for this Learning Path.
- Description: Add the description of what the learning path is about.
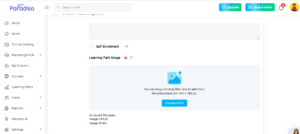
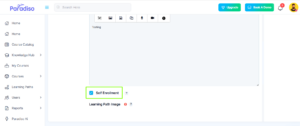
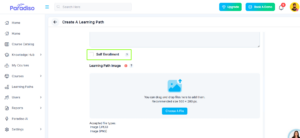
- Self Enrollment: Enabling this will add the Learning Path to the Learning Path Catalog, allowing users to enroll themselves.
- Learning Path Image: You must upload a Learning Path image (recommended size: 500 × 280 px).
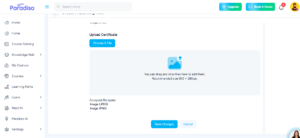
- Upload Certificate: If you upload a certificate, the Certificate button will become active/visible to the user only after they complete the Learning Path. Until completion, the button will remain inactive/hidden.
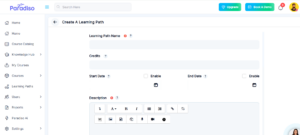
Step 4: Click on Save Changes button.
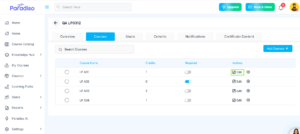
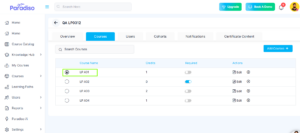
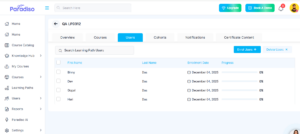
Add Courses, Set prerequisites and Required Courses
Add Course
To add a course to a Learning path:
- Go to Learning path Landing page and select and open a created learning path to add the course.
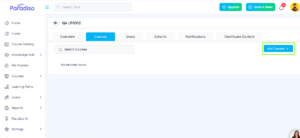
- Click on the course tab to Add Courses

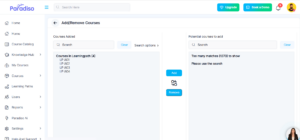
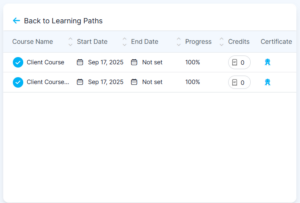
At the right side, you will see a Add Courses button, click on it to select the courses. Then select the courses you want to add.
Add Required Courses
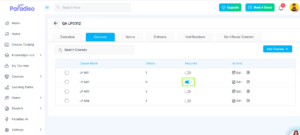
On the list of selected courses within the learning path, you can click on the switch from the column “Required” to set this course as mandatory within the learning path.
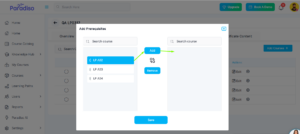
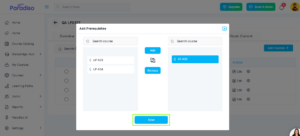
Adding Prerequisites
Here is where you’re going to be able to set up prerequisites. This means that you can choose a course as a condition to complete before taking another one:
- Click on the edit icon (pencil) of the course you want to add prerequisites to.
- Select the courses you want to add as prerequisites for the course selected above.
- Click on “Add” once you have selected the courses.
- Click on Save
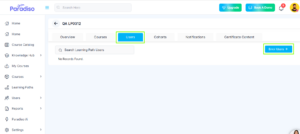
Adding users and Cohorts
Adding users
If you need to add a user to a Learning path, Click on the “Users” Tab.
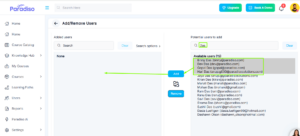
Click on the “Enroll Users” button on the right. A pop-up will appear where you can search for and add selected users to enroll in the Learning Path.
If you want to add a specific user, you can look for it using the search box at the right, and select the desired user or multiple users and click on “Add” once you have selected the users.
Once you added the users you want. Click on back arrow.
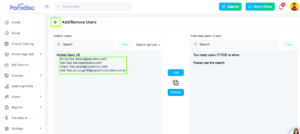
If you are going to delete a user, Just select the specific user.
The click on the Delete Users button.

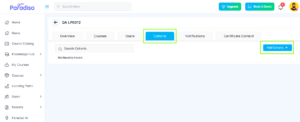
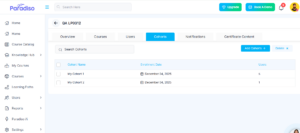
Adding Cohorts
- Inside a Learning path, Click on the “cohorts” tab
- The click on the Add button.
- Select the Cohort you want to sync with this learning path (Or select all)
- Save Changes
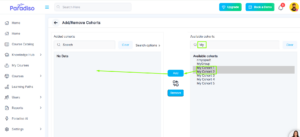
If you need to add a cohort to a Learning path, Click on the “Cohorts” Tab.
Click on the “Add Cohorts” button on the right. A pop-up will appear where you can search for and add selected cohorts to enroll in the Learning Path.
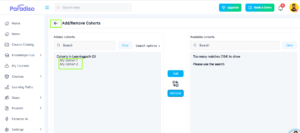
If you want to add a specific cohort, you can look for it using the search box at the right, and select the desired cohort or multiple cohort and click on “Add” once you have selected the cohorts.
Once you added the cohort you want. Click on back arrow.
Note: To add or Remove Users from cohorts, you must go to Cohorts settings. Route: /cohort/index.php
If you are going to delete a cohort, Just select the specific cohort.
The click on the Delete button.
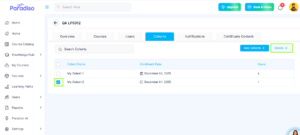
Learning Path Self Enrollment
Learning Path Self-Enrollment allows users to enroll themselves into a Learning Path through the Course Catalog.
- When placed on the Learning Path, click on the right pencil icon, to edit the settings
- On the new screen that will pop up, scroll down and click on “Enable Self Enrollments”. Then, save changes.

- While creating Learning Path, you can enable “Self Enrollment” checkbox
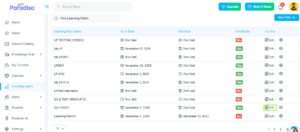
- From the Course Catalog, click on the Category called “Learning paths”.
- You will see the list of learning paths available for self-enrollment.
- Click on a Learning Path to see all the courses that make up the Learning Path.
- Click on the “Enroll me” button to self-enroll into the Learning Path.
To show Learning Path as a category on Course Catalog can be enable/disable from the theme. Follow the path – Settings(From Left Navigation)->Theme Settings->Common Settings – “Enable Learning Path on Course Catalog”. By default it will be disabled.
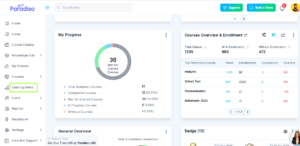
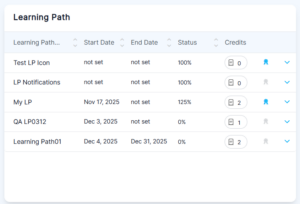
Learning Path Dashboard
From the Learning Path Dashboard users can see any information related to their learning paths!
- From the Home Page, turn the “customize this page” on.
- Click on the “Add block” option.
- Look for the “Learning Path Dashboard” from the list and click it.
- Once added, you will be able to see all information related to the learning paths you’re enrolled in.
Notifications
How to set up notifications
To set up the Learning Path, go to the Learning Path from the left navigation:
Open the Learning Path where you want to setup the notifications.
Go to the notifications tab
Select the type of notifications you want to activate, click and check the option called “Enable for user”
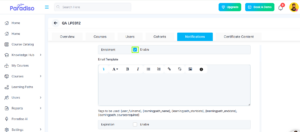
Write your message and click on save changes
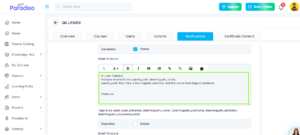
Wildcards
You can use wildcards that will help you send more complete messages to your users
- {learningpath_startdate} = Indicates the current Learning Path start date.
- {learningpath_enddate} = Indicates the current Learning Path end date.
-
{learningpath_coursesrequired} = Indicates the courses that the user must complete to complete the Learning Path
-
{learningpath_fullname} = Indicates Learning Path full name
-
{learningpath_credits} = Indicates the total credits that you may obtain once the Learning
Path is completed -
{user_fullname} = mentions the user’s name and last name
Type of notifications
- Enrollment: informs a user when it has been enrolled in a Learning Path
- Expiration: Informs a user when the Learning Path has expired
- Enrollment Reminder: Reminds a user after a specific amount of days about the Learning Path where previously it has been enrolled to.
- Expiration Reminder: Reminds a user when a Learning Path is about to expire.
- Completion Reminder: Reminds a user to complete the pending or incomplete courses in a Learning Path.
- Path Completion: Informs a user when all the required courses on a course have been approved and completed.
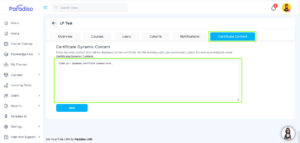
Certificate Content
This feature allows learners to receive a certificate automatically upon completing a Learning Path. The certificate can be uploaded during Learning Path creation or configured using the new Certificate Content tab.
The Certificate Content tab allows administrators to configure and generate certificates for learners upon completion of the Learning Path.
Using this tab, admins can:
-
Set up a certificate template for the Learning Path.
-
Customize certificate details such as learner name, Learning Path name, completion date, and issuer information.
-
Preview the certificate before saving.
-
Ensure that a certificate is automatically generated and issued to the learner once all required courses in the Learning Path are completed.
This feature helps provide learners with an official completion certificate directly after finishing the Learning Path.
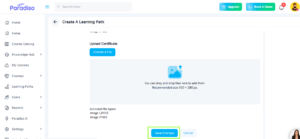
How to Add a Certificate While Creating a Learning Path
-
Log in as Admin/Client Admin
-
Navigate to Learning Path from the left navigation menu.
-
Click New Path.
-
Enter the required learning path details.
-
Upload the certificate using the Upload Certificate field.
-
Click Save Changes.
-
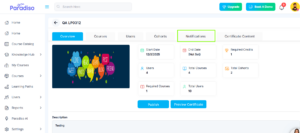
Go to the Learning Path Overview tab and click Preview Certificate to verify.

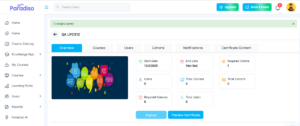
Admin View
-
After saving, the admin is redirected to the Learning Path Overview tab.
-
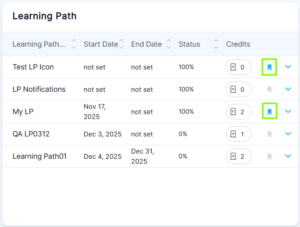
If a certificate is uploaded, the Certificate menu becomes visible in the learning path.
-
Admins can preview the uploaded certificate by clicking the Preview Certificate button.
Learner Experience
-
Enrolled users can see the learning path in the Learning Paths block on the dashboard.
-
The Certificate button remains hidden until the learner completes the learning path.
-
Once the learning path is completed:
-
The Certificate button becomes visible.
-
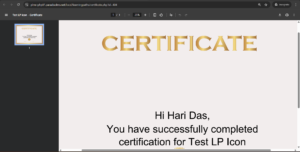
Clicking the button opens the certificate in a new tab.
-
-
The certificate displays:
-
Learner’s name
-
Learning path name
-
-
Learners can download and print the certificate using the available options.
Certificate Template Option
-
In the Certificate Content tab, admins can select or add a certificate template.
-
Based on the selected template, certificates are generated and issued to users upon completion.