Contents
Adding a new course
By default a regular instructor can’t add a new course. To add a new course to LMS, you need to have either Administrator, Course Creator or Manager rights.
To add a course:
- From the Site administration link, click Courses>Manage courses and categories
Click New course in the category page on the right
- Click on the category where you want your course to be. For more information see Course categories
- Click the “New course” link
- Enter the course settings, and then choose either to “Save and return” to go back to your course, or “Save and display” to go to the next screen.
- On the next screen,if you have chosen “Save and display”, choose your users/instructors to assign to the course.
Upload courses
In addition to creating new courses, the upload courses functionality may also be used to update or delete courses, or import content from another course. For information on using this functionality to create course templates, see Adding a new course.
To upload one or more courses
- Go to Administration > Site administration > Courses > Upload courses
- Either drag and drop the CSV file or click the ‘Choose a file’ button and select the file in the file picker
- Select appropriate import options carefully, then click the preview button.
Note: It is also possible to use the command-line tool admin/tool/uploadcourse/cli/uploadcourse.php.
When using the web interface, use the Preview option to see if any errors were detected in the previewed rows. If you proceed with the upload and there were something wrong detected with a course, it will be ignored.
Short file example
uploadcourse.csv:
Note: shortname, fullname, and category are required.
The category field takes the id of the category, with the default category Miscellaneous having id 1. Categories must already exist. If you put a category id that does not exist, you will receive a “Could not resolve category by ID” error during upload preview, and courses in that category will not be created.
shortname,fullname,category,summary,enrollment_1,enrollment_1_role,enrollment_1_enrollperiod,role_student
courserestored,Course restored,1,a summary,manual,student,1 month,
courserestored2,Course restored 2,1,a summary,,,,
courserestored3,Course restored 3,1,a summary,,,,padawan
courserestored4,Course restored 4,1,"a summary, with comma",manual,student,1 month,padawan
Notice there are no spaces between the items.
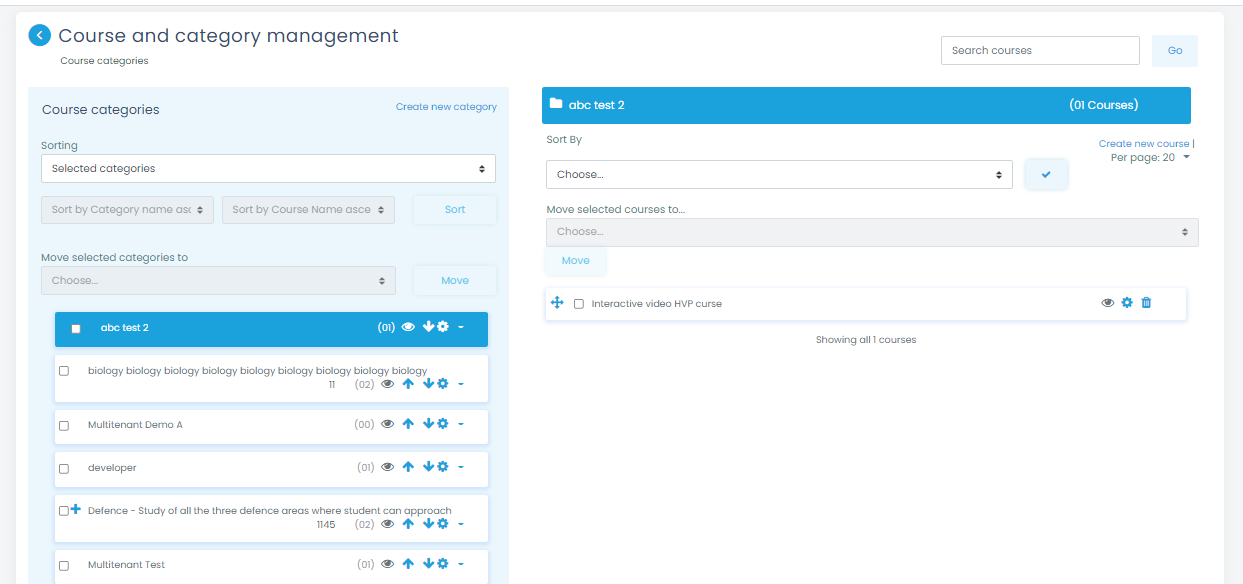
Course categories
Course categories organize courses for all LMS site participants. The default course category on a new LMS site is “Miscellaneous” (although this can be renamed) A Course creator, Administrator or Manager can put all courses in the Miscellaneous category. However, instructors and users will find it easier to find their classes if they are organized in descriptive categories.
The list of courses within a category by default shows the instructors and the summary of each course. If the number of courses within a category exceeds 9 (10 or more), then a short list without instructors and summary is shown.
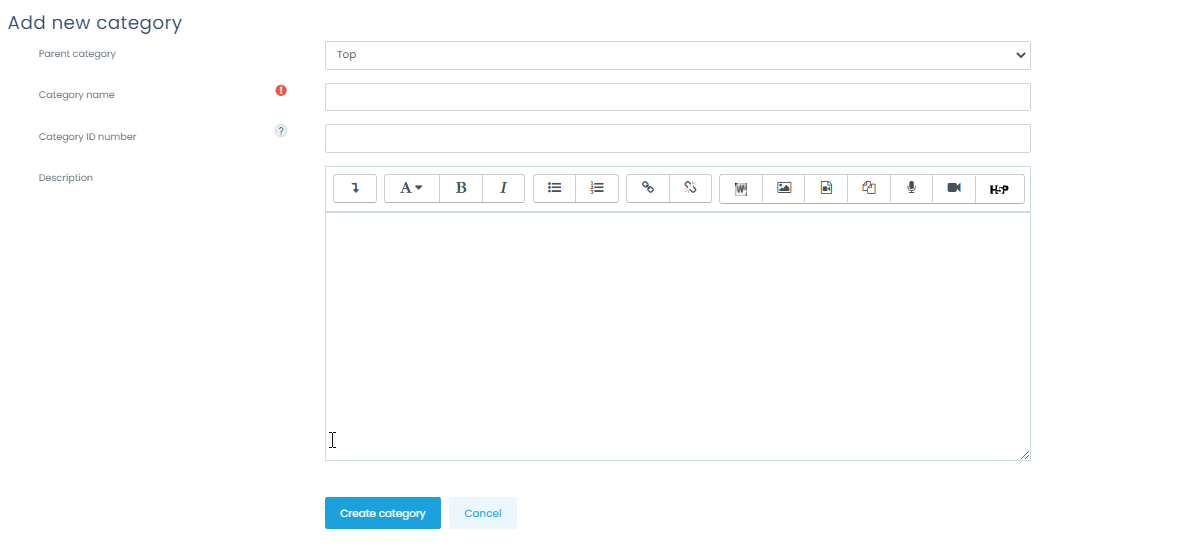
Adding a category
Most people organize their courses by department and college or by topic. Be sure to test the organizational scheme with a few users before entering a large number of courses, to save time in moving them later.
Adding categories is very simple:
- Go to Administration > Site administration > Courses > Add a category
- Complete the details required and click ‘Create category.’
- Alternatively, you can go to Administration>Site administration>Courses>Manage courses and categories and click the link ‘Create new category’.
- If you are on the category page (or you only have Manager rights at a Course Category level), click the ‘Manage courses’ button at the top-right of the page and then click the link ‘Create new category’.
If the category is visible, the course category description will be displayed to users when they enter the category, above the list of courses.
Editing or moving a category
- You can edit the details of a course category by clicking the actions icon next to its name in Administration>Site administration>Courses>Manage courses and categories. and selecting ‘Edit’.
- You can move categories up or down by clicking the up/down arrow next to the category you wish to move. You can bulk move categories by checking the box to the left of their name and then by selecting from the dropdown ‘Move selected categories to’
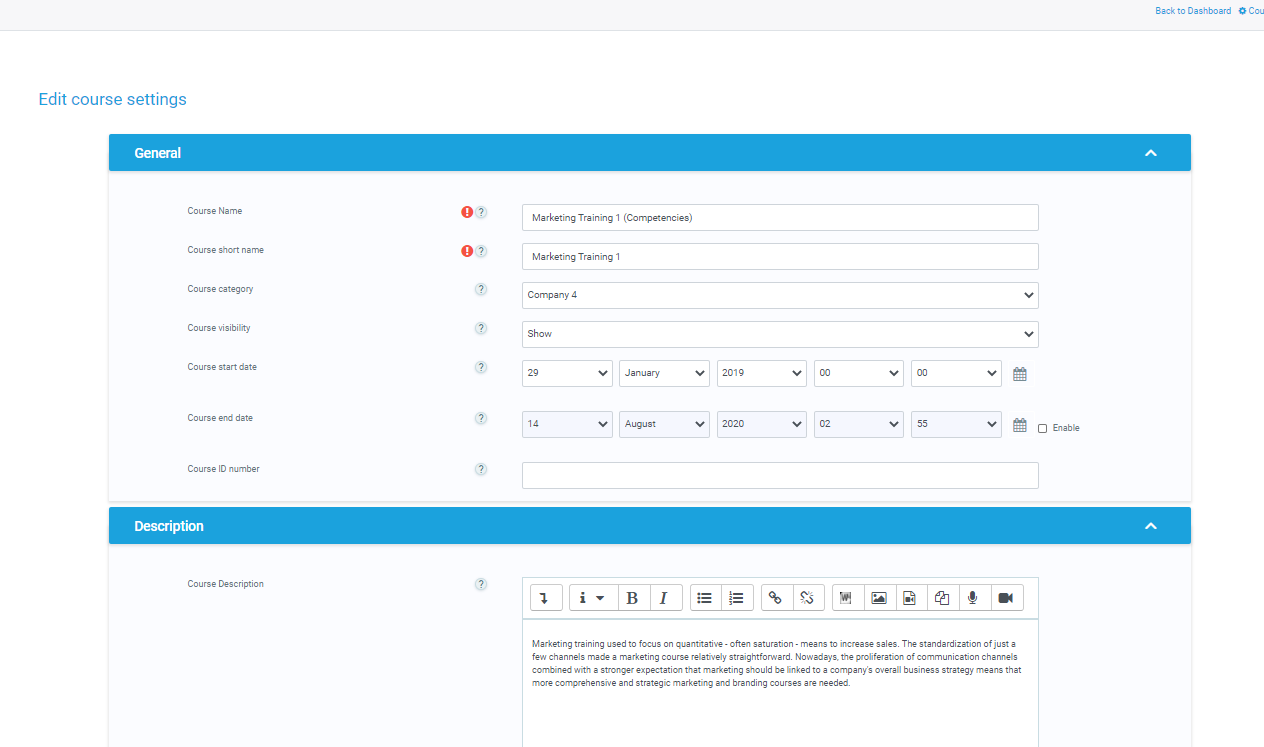
Course Settings
Course full name
This is the name of the course. It is displayed as a link on course lists on the Front page and on the Dashboard and in reports. It is also used in the browser title bar when the course is viewed.
The capability lms/course:changefullname controls whether a user can edit the course full name.
Short name
Many institutions have a shorthand way of referring to a course, such as BP102 or COMMS. Even if you do not already have such a name for your course, make one up here. It will be used in several places where the long name is not appropriate, such as the Navigation block.
The capability lms/course:changeshortname controls whether a user can edit the short name field.
By default, only course full names are displayed in the list of courses. However an administrator can enable short names to be displayed too if required by ticking the checkbox in Administration > Site administration > Appearance > Courses.
Course category
The site administrator may have created course categories to help instructors and users find their courses easily. Course categories may be reflected in the Navigation block.
The capability lms/course:changecategory controls whether a user can edit the course category.
Course start date
This setting affects the display of logs and the weekly format topic dates.
If you use the “Weekly” course format, the start date will appear in the first section of the course. For example selecting 27 July, will display “27 July – 2 August” in the first section (when default display is selected for that section).
This setting will have an effect on the display of logs. This will be the earliest possible date the log activity will display.
This setting will not affect courses using the ‘social’ or ‘topics’ formats.
- TIP: If your institution runs on a weekly schedule, you may want to consider setting the start date for courses on the first day of the week, like a Monday. Please note that the ‘first day of the week’ is set by the langconfig file of your Language, and might be different from the default Monday of the English language pack.
- TIP: In general, if your course does not have a real starting date then set the date to yesterday and use the availability setting to reveal the course to users.
- TIP: See self enrollment course settings to prevent users from entering the course before a certain date/time.
Course end date
The course end date is used for determining whether a course should be included in a user’s list of courses. When the end date is past, the course is no longer listed in the navigation block / drawer and is listed as past in the Course overview on users’ dashboards. The course end date may also be used by a custom report e.g. reporting activity for the duration of a course.
Users can still enter the course after the end date; in other words the date does not restrict access.
Calculate the end date from the number of sections
For courses in weekly format only, the course end date may be calculated automatically based on the course start date and the number of sections. If course sections (weeks) are added or removed, the course date is changed automatically. If ‘Calculate the end date from the number of sections’ is ticked, the course end date can not be set manually.
Course visibility
Here you can “hide” your course completely. It will not appear in the list of courses, except for managers, course creators, instructors and any other users with the view hidden courses capability. Even if users try to access the course URL directly, they will not be allowed to enter.
The hide/show courses capability controls whether a user can hide a course.
Course ID number
The ID number is an alphanumeric field. It has several potential uses. Generally, it is not displayed to users. However, it can be used to match this course against an external system’s ID, as your course catalogue ID or can be used in the certificate module as a printed field.
The capability lms/course:changeidnumber controls whether a user can edit the ID number.
Course Format
A course format refers to the layout of a course. The course format can be selected in Administration > Course administration > Edit settings.
An administrator can enable, disable or delete course formats for courses in Administration > Site administration > Plugins > Course formats > Manage course formats. They can also change the order in which available course formats are displayed to instructors in the course settings.
To review the formats you can use for your course, please refer to the course format.
Course homepage
Parts of a course homepage
An LMS course can look very different according to the theme and course format (layout).
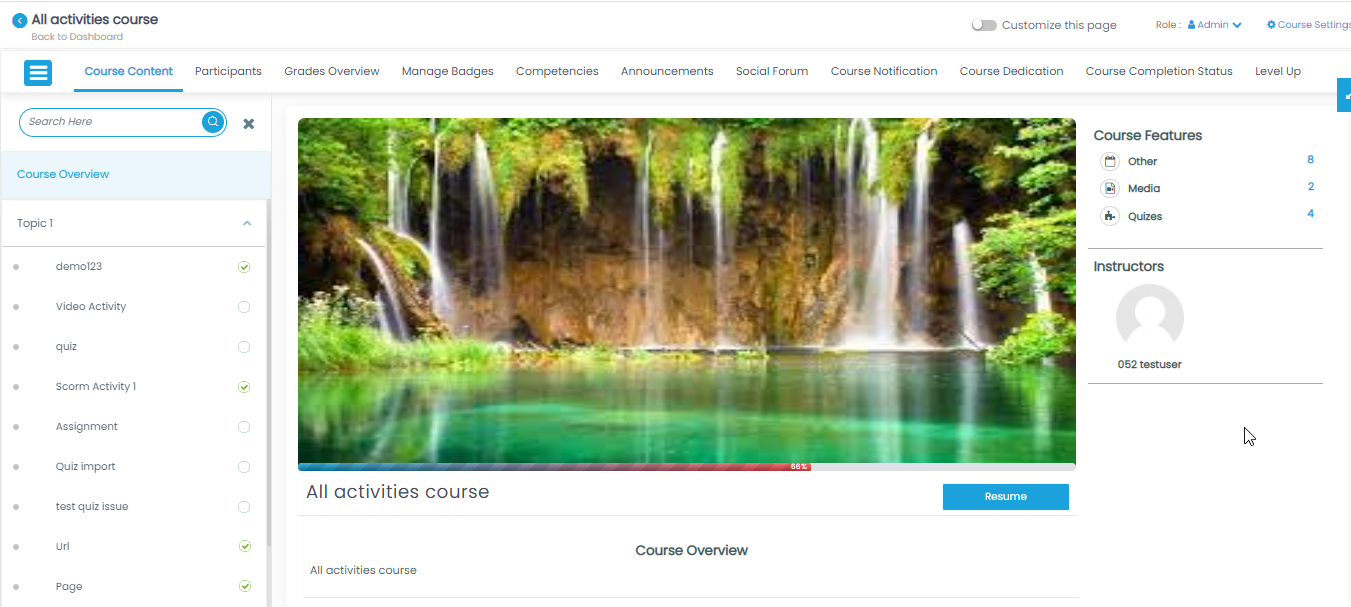
1.Navigation block
Normally visible on all pages, this block helps you find your way around the course and site.
Again, normally visible on all pages, this block gives different levels of access to instructors and users.
Here is where the learning materials are displayed. This element may be arranged in one or multiple weeks, topics, forums or other (non-standard) layouts.
Which blocks you see depend on what the administrator has selected and what you as instructor choose to add.
5. Navigation drawer
This replaces the Navigation block and Administration block in the theme. For course section links to appear, ‘Always link course sections’ (linkcoursesections) must be enabled by an administrator in the Site administration.
6. Gear menu
This replaces the course administration settings in other themes.
To edit a course section
- Turn editing on
- Click the pencil icon (1 in screenshot below) to quickly rename the section
- Click the Edit menu (2 in screenshot below) to edit the description and other settings.
Section editing menu
If Restrict access is enabled for the site, access to the section (including all activities and resources within it) may be restricted.
To move a course section
- Turn editing on
- Click the up/down arrow or the crosshairs icon to move the section
- Drag the section to where you want to position it and let go
Note: The ability to move course sections is controlled by the capability lms/course:movesections, which is allowed for the default role of instructor.
Restrict access
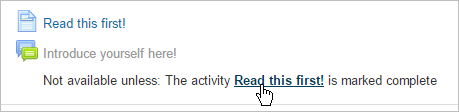
The restrict access feature enables instructors to restrict the availability of any activity or even a course section according to certain conditions such as dates, grade obtained, group or activity completion.
| Note: If you don’t see a ‘Restrict access’ option when setting up course activities and sections, check with the administrator that it is enabled in Site administration > Advanced features. |
Tracking progress
There are several ways to track users progress in LMS. This page outlines what is available to instructors in a course.
Grades
Every course has its own Gradebook which is accessible from Course administration > Grades. Some activities such as Assignment and Quiz send grades back to this gradebook. It is also possible for instructors to enter grades directly into the gradebook.
Competencies
Competencies describe the level of understanding or proficiency of a learner in certain subject-related skills. Competency-based education (CBE), also known as Competency-based learning or Skills-based learning, refers to systems of assessment and grading where users demonstrate these competencies.
Activity completion
If Activity completion is enabled by the administrator and in the course settings, instructors can indicate for each course item how they wish it to be registered as complete. A tick/checkmark will then appear against the activity. users may either mark it complete manually or the item will automatically be registered as complete once a user has met the specified criteria. These may be viewing a resource, submitting an assignment, posting in a forum or other conditions. The instructor can see an overview of who has completed what in the activity completion report in Course administration > Reports > Activity completion.
Course completion
As an extension of activity completion, enabling Course completion allows for a course to be officially marked as finished, either manually or automatically according to speficied criteria. If the Course completion status block is added, users can see their progress during the course. Instructors can view the overall progress of users towards course completion from Course administration>Reports>Course completion.
Badges
Badges can be awarded either manually or using activity completion settings in a course and are a popular way to motivate users. Users may be awarded badges at different stages of the course for different levels of progress.
Course reports
A number of Course reports are available to the instructor in their course to help them track the progress of their users. In addition to the activity and course completion reports mentioned above (which are only available if these settings are enabled) there are also activity reports, participation reports and general course logs.
Analytics
The Analytics feature, provides detailed descriptive and prescriptive reports to support learners at risk.
Course FAQ
How do I get rid of the instructors’ names on my course descriptions?
By default LMS will show names of instructors on course descriptions. If you don’t want this, uncheck the role in Administration > Site Administration > Appearance > Course contacts.
How do I add the names of non-editing instructors to my course descriptions?
By default LMS will only show names of instructors on course descriptions. If you want to add other roles, check the role in Administration > Site Administration > Appearance > Course contacts.
Some of my courses have the course summaries showing but some only have an information icon. Why?
Categories which have fewer than ten courses will show the full summary but those with more will only show the information icon. If you want them all to show the full summary then change the value of the Courses with summaries limit (courseswithsummarieslimit) setting in Site Administration > Appearance > Courses.
I can’t upload files to my course. I get the message that my ‘filetype cannot be accepted’
- Make sure you are not trying to upload to the course summary files area in the ‘Edit settings’ area of course administration.
- This upload area is only for files describing the course and by default only image files are allowed (so that a screenshot may be displayed next to the summary).
- If you wish to upload files into your course, make sure you are first on the main course page itself, not in the settings of the course.
How can I prevent instructors from being able to add a particular resource or activity?
From Site administration>Users>Permissions>Define roles, edit the instructor role and untick “allow” on the capability of the module you wish them not to add – for example mod/workshop:addinstance
I see two dropdown boxes instead of the Add an activity or resource link
- Check in your user preferences >Course preferences that you have ‘Enable activity chooser’ ticked
- Check you have Ajax enabled – the link does not appear without Ajax enabled.
Why am I getting dates in the future on a course I have restored?
If you restored a course with user data but set the enrollment date for the present time, then logs, forum posts and so on will still be set at the same time distance from the start of the course. So if your original course began in 2010 and participants posted in a forum in 2012, then if you restore your course to begin in 2014, all those posts will have a date of 2016 on them.
How can I make my course home page look more like a web page?
Often when a course has a lot of content, users and instructors find the long scrolling tedious and would prefer a ‘neater’ appearance with hyperlinks to sections in a similar way to the way pages on websites work.
See Stealth activities for information on how to do this in a LMS course.
Where can I find a list of all course resources and activities?
You can find a list of resources (ie static pages and folders etc) here:
http://yourlmssite.net/course/resources.php?id=x
where x is the course ID number.
If you wish to see the list of activities such as quizzes, then use a URL such as this
http://yourlmssite.net/mod/quiz/index.php?id=x
where x is the course ID number.
Change the activity name according to the activity you need to see listed.
Is there a shortcut URL to a course?
Try this using the course shortname: URL (LMSsite)/course/view.php?name=shortname to navigate directly to a course.
What happens to my course content if I change the format from one format to another?
For standard course formats only: If you change from Topics to Weekly or Weekly to Topics, then the only real difference will be in the titles of the sections. If you change to Social format then you will just have a forum and if you still want access to your other activities you need to add the “Social activities block”. If you change to the Single activity format you will only see the activity you chose to display, and your other activities will be hidden from users but available to you in a greyed out section. If you then revert back from Single activity to Topics or Weekly format you will need to un-hide those sections.
How can I move items easily on a course with lots of activities?
See the Tips and tricks section of Course homepage for a method allowing you to avoid scrolling issues when moving an activity or resource in a busy course.