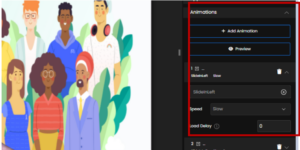
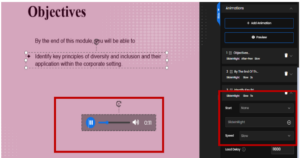
To add an animation, first select the element and move to the right drawer. Under the dropdown animation section, click on add animation. From here, you can choose the animation type, set the speed, and define the delay or duration according to your requirement.
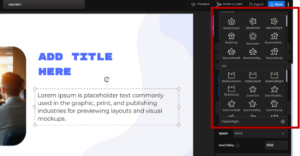
For the selected element, you can apply animations for both entry and exit. Simply choose the desired animation type under the Entrance category to define how the element appears, and under the Exit category to define how it disappears.
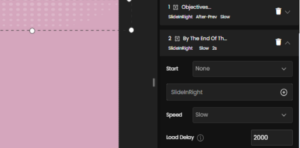
After selecting the animation, you can adjust its speed from slow to Fast. Choosing the slower speed makes the animations appear more gradual, while faster speeds create a quick transition.
There is a Load Delay option which specifies the time at which animation is going to appear on the screen. The value entered is measured in milliseconds, where 1000 milliseconds equals 1 second. Example, if you set the delay to 2000, the animation will begin 2 seconds after the slide loads.
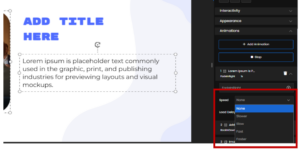
For the subsequent elements, an additional option called Start becomes available. This controls how animations will play in relation to the first animation. The options are None, With Previous and, After Previous.
Selecting With Previous makes animations play simultaneously with the earlier animation.
Selecting After Previous ensures animation begins only once the earlier animation is completed.
When None is selected, you must manually specify the exact load delay(in milliseconds) to determine when the element should appear on the screen.
This way you can add animations and synchronize it with the other elements on the slide to provide a continuous engaging slide.