About Schedule Report:
- The Scheduled Report feature allows administrators to set up reports that run automatically based on a specified day and time.
- To schedule a report, you simply select the generated report and configure the schedule with a specific date, time, and target user. The report will then be delivered to the selected user—typically in CSV format—so the user can access the report directly without needing to log in to the LMS.
How to Create Schedule Report:
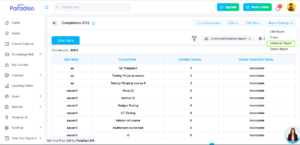
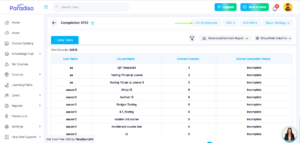
- Step 1: Go to Reports from the left-side navigation bar and click on Report
- Step 2: Select and Open the created report which you want to schedule.

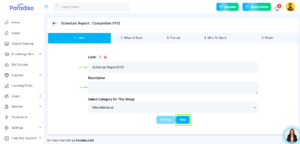
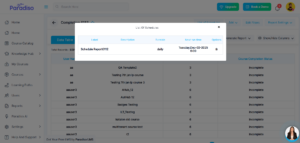
- Step 3:Open Report Settings and click on Scheduled Report.
- Step 4: Enter the Label and Description, then click Next.
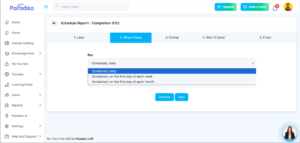
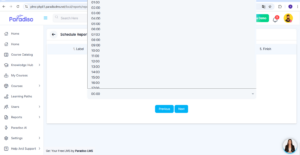
- Step 5: Select the Day & Time when the report should run. Also select the Timing at which it should trigger then click Next.
- Step 6:Select the Report Format and click Next.

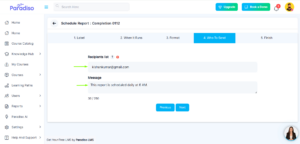
- Step 7: Under Who to send, enter the user’s email ID and add a message (optional), then click Next.
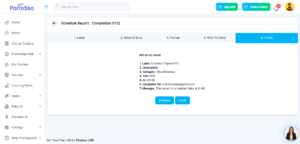
- Step 8: Review all the details on the summary screen. If you need changes, click Previous. If everything is correct, click Finish.
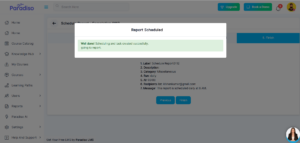
- Step 9: A confirmation pop-up stating Report Scheduled will appear. This means your report is successfully scheduled.
- Step 10: You can also view the count of scheduled reports, and you can delete any scheduled report from this section if needed.
Use of Schedule Report:
- Schedule reports can be modified or removed, we can assign Report to a particular user or manager as per the data given.
- After creating the report with the help of Schedule Report we can directly assign to the respective end uses. So, end user can get direct access to the report.