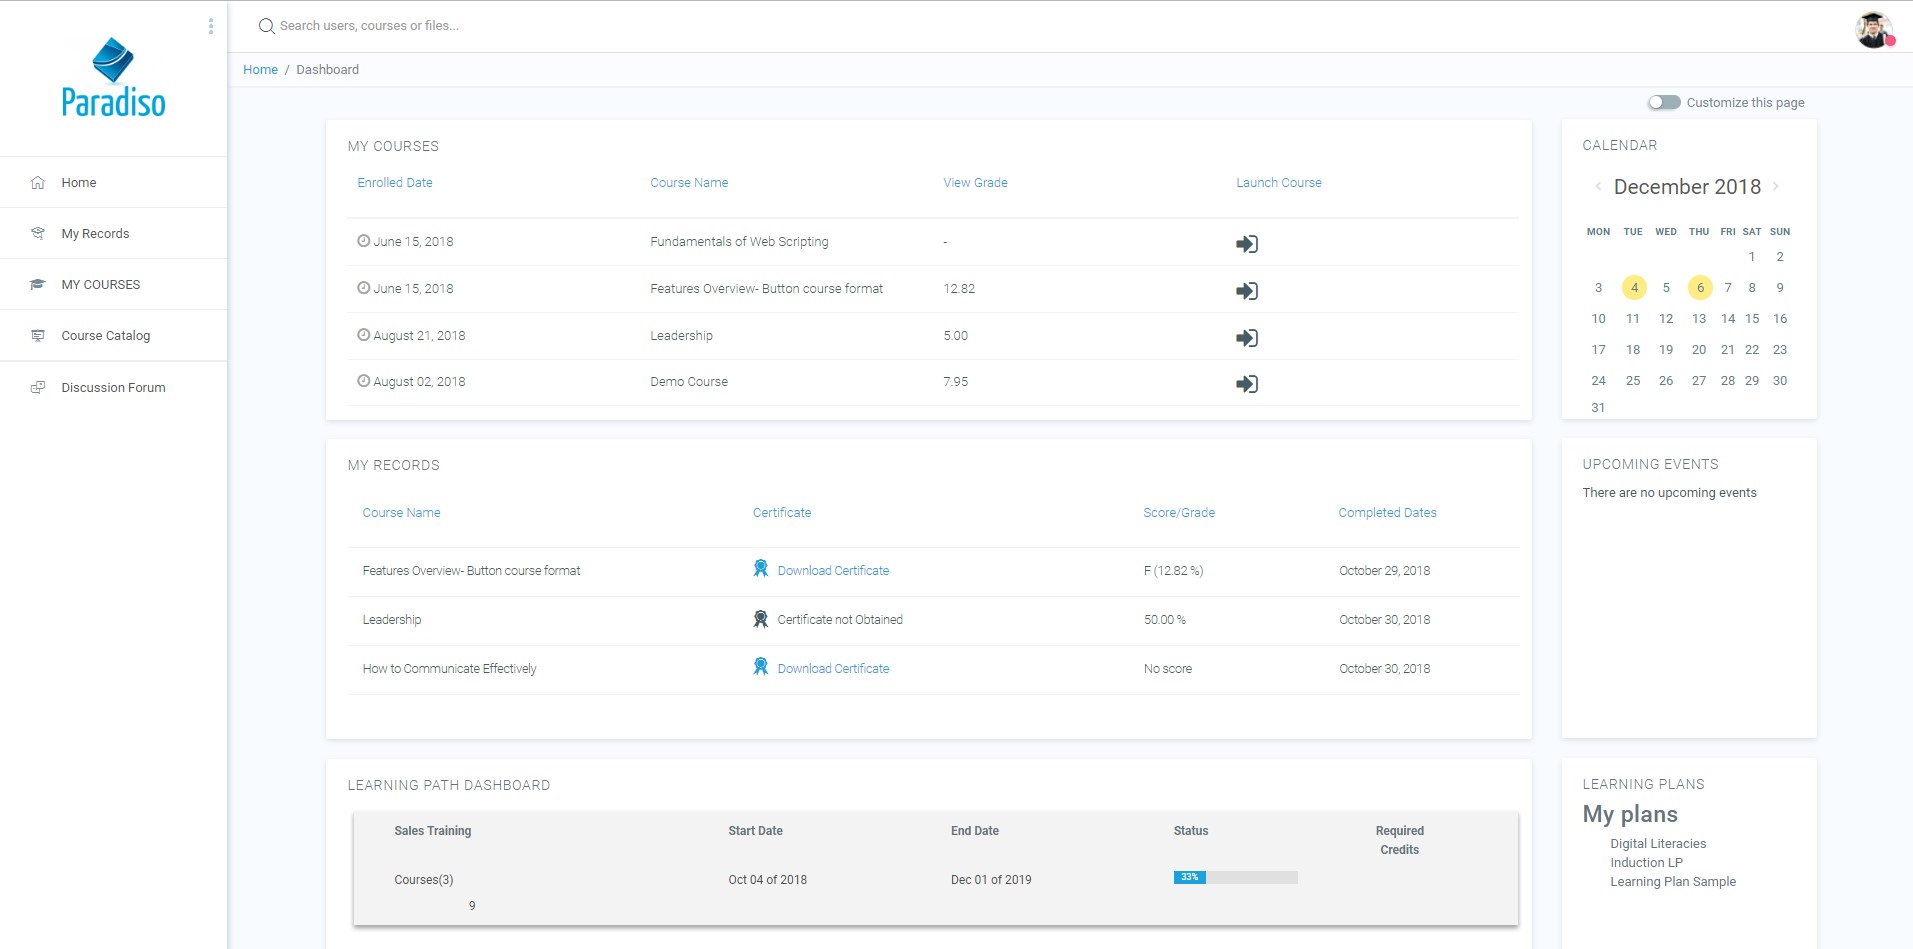
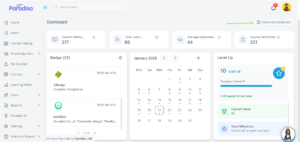
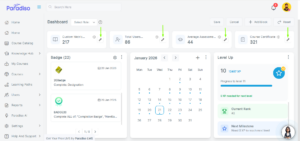
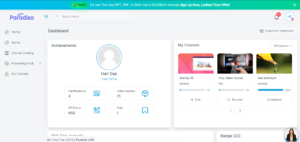
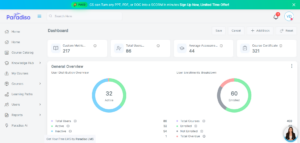
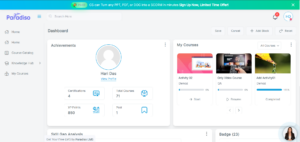
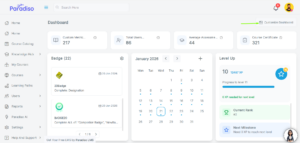
The Dashboard is a customizable page for providing users with details of their progress and upcoming deadlines. In the center is the Course overview block which allows users and instructors to easily track required activities and filter courses.
Quick access to Dashboard is also available from the user menu top right of the screen once logged in:

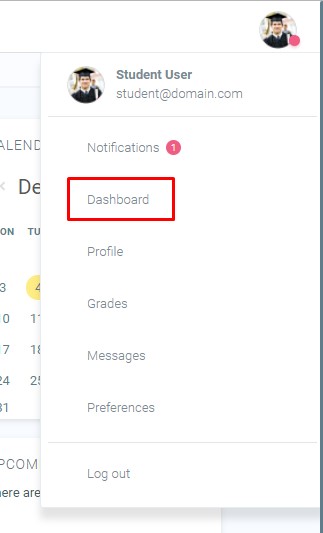
User menu
The Navigation drawer or block includes a Dashboard link directly above or below the Site home link. Once a regular user is logged in, the My Courses link will also take them to their Dashboard
Contents
1 Resetting Dashboard to default
3 Setting the default Dashboard
4 Preventing users from customizing their Dashboard
6 Preventing users from adding a block to their Dashboard
Resetting Dashboard to default
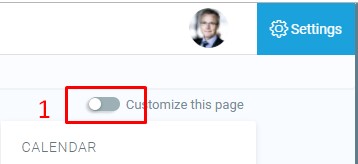
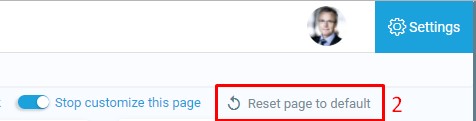
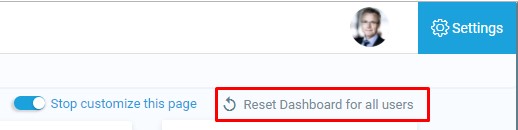
If a user has customized their page and wishes to revert back to the original settings, they can click the ‘Reset page to default’ button (2) after first clicking the ‘Customise this page’ button (1).
(Note that an administrator can reset the Dashboard for all users from Settings > Appearance >Default Dashboard page).
Default home page
For new installations, Dashboard is the default homepage for logged in users. An administrator can change the default home page in Settings > Appearance > Navigation.
If ‘User preference’ is selected as default home page, each user needs to navigate to Dashboard either via the Navigation block or the user menu and then from the Administration block click the “Make this my default homepage” link. Note that this option only appears on the page that is not their current default home page. Once selected, LMS will remember which page to present them each time they log on.
Setting the default Dashboard
An administrator or manager (or another user with the capability lms/my:configsyspages) can set the default blocks for all users from Settings > Appearance > Default Dashboard page.
Clicking the button ‘Reset Dashboard for all users’ will then apply these settings to the Dashboard for everyone on the site.
Default blocks are:
- Navigation
- Administration
- Course overview
- Private files
- Latest badges
- Calendar
- Upcoming events
- Online users
Preventing users from customizing their Dashboard
By default, users can customize their Dashboard and add blocks. An admin can prevent this as follows:
- Go to Settings > Users > Permissions > Define roles
- Edit the authenticated user role and untick the Manage Dashboard blocks capability
Dashboard capabilities
- Manage Dashboard blocks (see above)
- Configure system templates for Dashboard
In addition, all blocks which may be added to a Dashboard have a myaddinstance capability (e.g. block/comments:myaddinstance) for controlling whether a user with a particular role can add the block.
Preventing users from adding a block to their Dashboard
By default, users can add many blocks to their Dashboard. An admin can prevent them from adding a particular block, such as the Online user’s block, as follows:
- Go to Settings > Users > Permissions > Define roles
- Edit the authenticated user role and untick the Add a new online users block to the Dashboard capability
Blocks not available on the Dashboard
The following blocks may not be added to a user’s Dashboard (because it wouldn’t make sense):
Dashboard Key Stats Cards
Overview
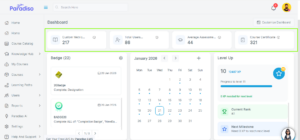
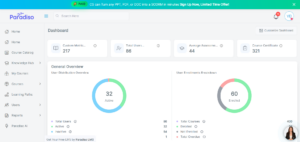
The Dashboard Key Stats Cards feature provides a quick snapshot of key LMS performance metrics on the Dashboard.
It helps Admins, Client Admins, and Managers monitor overall platform activity such as users, courses, enrollments, assessments, certifications, and organizational growth.
The dashboard displays four key stats cards, which can be configured at the organization level.
Who Can Access Dashboard Key Stats Cards?
| Role | View Stats Cards | Edit / Configure |
|---|---|---|
| Admin | ✅ Yes | ✅ Yes |
| Client Admin | ✅ Yes | ✅ Yes |
| Manager | ✅ Yes | ❌ No (View only) |
| Student | ❌ No | ❌ No |
Note: Edit access is available only to Admin and Client Admin, and only when Dashboard Customization is enabled.
Where Are the Stats Cards Displayed?
-
Stats cards are displayed on the LMS Dashboard
-
Exactly four stats cards are shown at a time
-
Cards are visible only when Enable Statistics is turned ON
What Information Does a Stats Card Show?
Each Key Stats Card includes:
-
Icon – Represents the metric visually
-
Card Name – Title of the statistic
-
Metric Value – Calculated organization-level data
-
Tooltip – Description shown on mouse hover
-
Edit (✏️) Icon – Visible only to Admin / Client Admin when customization is enabled
Enabling or Disabling Stats Cards
Navigate to:
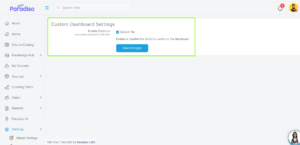
Master Settings → Appearance → Custom Dashboard Settings
-
Enable the Enable Statistics option
-
Save settings
Result:
-
Enabled → Stats cards appear on Dashboard
-
Disabled → Stats cards are hidden from Dashboard for all users
Dashboard Customization Control
-
The Dashboard Customization setting controls whether stats cards can be edited
-
When customization is:
-
Enabled → Admin and Client Admin see the Edit icon
-
Disabled → Edit option is hidden for all roles
Manager –
Student –
-
-
Managers can never edit, even when customization is enabled, but can view stats card.
-
Students can never edit, even when customization is enabled
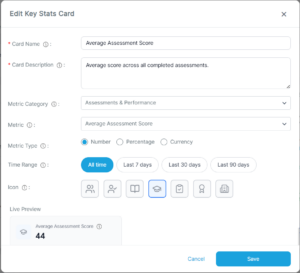
How to Edit a Stats Card (Admin / Client Admin Only)
-
Log in as Admin or Client Admin.
-
Go to the Dashboard and click Customize Dashboard.
-
The Edit (✏️) icon appears on each stats card.
-
Click the Edit (✏️) icon on the required stats card.
-
The Edit Key Stats Card window opens.
-
Enter the Card Name (mandatory).
-
Enter the Card Description (mandatory).
-
The text entered in Card Description will be displayed on the stats card as a tooltip when users hover over the card.
-
-
Select the Metric Category and the corresponding Metric.
-
Select the Time Range, if applicable.
-
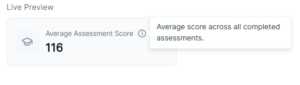
Preview the changes using Live Preview.
-
Click Save to apply the changes.
Changes are applied at the organization level and are visible to all Admins, Client Admins, and Managers.
Editing Metrics on a Stats Card
Admin and Client Admin users can customize each stats card by:
-
Selecting a Metric Category (for example: Users, Courses, Enrollments, Assessments, Certifications)
-
Selecting a specific Metric under the chosen category
-
Changing the Metric Type, Time Range (if supported), and Icon
Based on the selected metric category and metric:
-
The metric value on the stats card updates automatically
-
The Live Preview reflects the selected configuration before saving
Fields Available While Editing a Stats Card
| Field | Description |
|---|---|
| Card Name | Name shown on the stats card (mandatory) |
| Card Description | Tooltip text displayed on hover (mandatory) |
| Metric Category | Category of the statistic |
| Metric | Specific metric under the selected category |
| Metric Type | Defines how the metric is calculated |
| Time Range | 7 / 30 / 90 days (only for supported metrics) |
| Icon | Icon displayed on the card |
| Live Preview | Real-time preview of the stats card |
Live Preview Feature
-
Updates instantly when any field is changed
-
Shows how the stats card will look after saving
-
Ensures accuracy before applying changes
Time Range Behavior
Metrics that support time range
-
Metric value updates when 7 / 30 / 90 days is selected
Metrics that do not support time range
-
Value remains unchanged and shows all-time data
Important Notes
-
Stats cards display organization-level data only
-
Individual user-specific data is not shown
-
Only four stats cards can be displayed at a time
-
Any configuration changes affect all admin-level users
-
Learners do not have access to this feature
Common Issues & Troubleshooting
Stats cards are not visible
-
Check if Enable Statistics is enabled
-
Confirm user role (Learners cannot view stats cards)
Edit icon is not visible
-
Ensure user is Admin or Client Admin
-
Verify Dashboard Customization is enabled
-
Managers will not see the edit option
Unable to save changes
-
Ensure Card Name and Card Description are filled