LMS Mobile

LMS Mobile

Jump to: navigation, search

On the move with LMS

Access your LMS course on your mobile

With LMS Mobile, the official mobile app for LMS, you can

  • Browse the content of your courses, even when offline
  • Receive instant notifications of messages and other events
  • Quickly find and contact other people in your courses
  • Upload images, audio, videos and other files from your mobile device
  • Track your progress, mark tasks as complete and browse your learning plans
  • Attempt quizzes, post in forums and edit wiki pages
  • View your course grades

… and lots more – see the full list of LMS Mobile features.

Using the app

Note: The LMS Mobile app will ONLY work with LMS sites that have been set up to allow it. Site admins, please see the LMS Mobile guide for admins.
New feature
in LMS 3.4!

Links to download the app are available in the footer and user profile pages when mobile access is enabled:

Video description

Teachers, for info on improving your courses for access via the app, please see Creating LMS Mobile friendly courses.

Staying up to date with new features and improvements

Follow @lmsmobileapp on Twitter for news, updates and release announcements and join the discussions in the LMS for mobile forum on paradisolms.net.

See New for mobile and the LMS Mobile release notes for details of new features recently added.

See also

LMS Mobile availability plugin

LMS Mobile availability plugin

Jump to: navigation, search

The LMS Mobile availability plugin enables you to choose if an activity, resource or course section is (or is not) visible for users accessing the course via LMS Mobile.

Once installed, you can create LMS Mobile friendly courses by replacing activities or resources currently not supported by the app with Mobile friendly resources.

Installation

  1. Unpack the zip file into the availability/condition/ directory. A new directory will be created called mobileapp.
  2. Go to Site administration > Notifications to complete the plugin installation.

See Restrict access settings for general information on restricting access to sections and activities.

Screenshots

availability01.png
availability02.png

Mobileavailability.png

See also

Forum discussion: Display different materials depending on device

LMS Mobile quiz

LMS Mobile quiz

Jump to: navigation, search

Features

Users can attempt a quiz on their mobile device using the LMS Mobile app.

Notes:

  • Any quiz with standard question types and question behaviours is suitable for mobile access, apart from essay questions which require the student to upload a file.
  • Quizzes using additional plugins won’t work in the app unless the plugin include support for mobile remote add-ons (see in the dev docs LMS Mobile Remote add-ons).
  • Quizzes requiring safe browser are not supported.
  • Quizzes including blocked questions (questions that require that the previous question has been answered) are not supported.

Requirements

LMS Mobile quiz requires LMS 3.1 onwards.

Alternatively, it may be used with sites running LMS 2.6 to LMS 3.0 if the LMS Mobile additional features plugin is installed.

If you have quizzes with questions using TeX / MathJAX you must enable the TeX notation filter enabling all the LaTeX renderer settings. Please note that equations are rendered using LaTeX.

See also

LMS Mobile synchronization

LMS Mobile synchronization

Jump to: navigation, search

There are two ways of synchronizing data: automatic and manual.

Automatic synchronization

When an activity that can generate offline data is opened in the app, that activity will always be synchronized if the device is connected. For example, when opening a wiki while online, any offline data will be synchronized.

Furthermore, each activity type has an automatic synchronization process that runs regularly, usually every 10 minutes. Let’s use wiki as an example. When the wiki synchronization process runs, it synchronizes all wikis that have offline data and haven’t been synchronized in the last 5 minutes. This is to decrease the data usage of the app since the server might be down. This means that an activity could take up to 15 minutes to be synchronized in the worst case scenario. An example of the worst case scenario:

  1. Time = 0. The wiki automatic sync process runs. Nothing to sync.
  2.  Time = 5 minutes and 1 second. The user opens a wiki with no offline data, so the synchronization is successful.
  3. Time = 5 minutes and a few seconds. The user generates some offline data for that wiki.
  4. Time = 10 minutes. The wiki automatic sync process runs again. The wiki has offline data, but it has been synchronized in less than 5 minutes (step 2), so it isn’t synchronized again.
  5. Time = 20 minutes. The wiki automatic sync process runs again. Now the wiki is synchronized.

If an automatic synchronization runs when the device is offline, it will stop running until the device is online again. When the device is next online, all the automatic sync processes that were stopped will be run immediately, synchronizing the activities with offline data that weren’t synchronized in the last 5 minutes. For example:

  1. Forum sync process runs. Device is online, so it is executed.
  2. Device goes offline.
  3. Wiki sync process runs. Device is offline, so it stops being executed.
  4. Device goes online.
  5. Wiki sync process is executed since it was stopped. Forum isn’t executed yet because it wasn’t stopped, it will be executed after 10 minutes from step 1.

Finally, in App Settings > Synchronization there is a setting “Allow sync only when on Wi-Fi“. If this is enabled and the device is using a 3G/4G connection, the automatic sync processes won’t be run; their execution will be delayed for 10 minutes until the device uses a Wi-Fi connection.

Note that the automatic sync processes will only run if the app is alive; if the app is closed, the data won’t be synchronized until it is started again. Also, in iOS the app needs to be in the foreground (active) in order to execute the sync processes; if it is put in background (minimized) the processes won’t be executed until the app is in the foreground again.

Manual synchronization

When a user generates data offline, the app will display a message inside the activity informing the user that there is data to be synchronized. Performing a Pull To Refresh in that view will synchronize the data for that activity only (not for other activities). The activity can also be synchronized by opening the context menu in the top right and clicking “Synchronize“. So if a user performs a Pull To Refresh in a certain wiki, only that wiki will be synchronized. Performing a Pull To Refresh outside of the activity (e.g. in the section) will do nothing.

In App Settings > Synchronization the app will display a list of the sites stored in the app. Clicking the refresh button next to a site results in all automatic sync processes being executed immediately, so all activities with offline data that haven’t been synchronized in the last 5 minutes will be synchronized.

LMS Mobile quiz offline attempts

LMS Mobile quiz offline attempts

Jump to: navigation, search

LMS Mobile quiz offline attempts
Type Quiz access rules
Set N/A
Downloads https://paradisolms.net/plugins/quizaccess_offlineattempts
Issues https://tracker.paradisolms.net/browse/MOBILE
Discussion https://paradisolms.net/mod/forum/view.php?id=7798
Maintainer(s) Juan Leyva

Features

LMS Mobile quiz offline attempts allows users to download a quiz to attempt later offline. If the quiz is suitable for offline usage, the user will see the cloud – download option (as for SCORM or any resource).

A quiz may be attempted offline only if:

  • There is no time limit set
  • The question behaviour is deferred feedback (with or without CBM) only
  • There is no network address requirement

Please note that quiz questions are downloaded into the mobile app (but not the valid responses).

Requirements

LMS Mobile quiz offline attempts requires LMS 3.2 (without additional plugins) or LMS 2.6 onwards with the LMS Mobile additional features plugin and the Quiz offline attempts plugin installed.

Installation

  1. Download the plugin from https://paradisolms.net/plugins/quizaccess_offlineattempts
  2. Unzip the plugin into the mod/quiz/accessrules directory
  3. Go to Site administration > Notifications to complete the installation
  • Previous steps are not required for LMS versions equal and higher than LMS 3.2

Enabling a quiz for offline usage

  1. Edit the quiz settings
  2. Expand the “Extra restrictions on attempts” section
  3. Click the “Show more” link
  4. Enable the option “Allow quiz to be attempted offline in the mobile app” (Notice that this setting will be displayed only if the Mobile services are enabled in your LMS site)

Usage considerations

  • The setting “Allow quiz to be attempted offline in the mobile app” is disabled by default – it must be enabled for each quiz as required.
  • Offline quizzes are not compatible with quizzes using timers, access restriction by password or subnet and quizzes using behaviors different than deferred feedback without or with CBM
  • If a user wants to download a quiz for offline usage, an initial empty attempt will be created.
  • A user won’t be able to start a new offline attempt if a previous offline attempt is not synchronized, since the previous offline attempt will have an in-progress status.
  • If the quiz has a start date, the quiz can only be downloaded for offline after the start date.
  • If the quiz has a finish date it must be submitted (synchronized) before the finish date.
  • If a user submits their quiz attempt whilst not connected to Internet, the app will display a message like “Your responses could not be sent to the LMS site. The app will try to send them again once you are connected to Internet again…”. In the user attempts list, the attempt will be shown as ‘Finished but not submitted to the site’. The user will not be allowed to edit his responses or start a new attempt.
  • If the app detects that a user started or continued an attempt using the app, if they then try to continue the attempt on a computer they will be prompted to check whether they have any unsaved work on their mobile device.

Synchronization

The app will try to synchronize each time the user goes from offline to online (even if the user is not attempting the quiz). It will be done on a question-by-question basis.

Conflict resolution

This is done on a question-by-question basis; each question will be synchronized depending on the sequence check number and last action time.

See also

Creating LMS Mobile friendly courses

As more and more students access courses from their smartphones, tablets or other mobile devices, it is increasingly important to ensure your courses are mobile-friendly.

Encouraging students to install the official LMS mobile app is one way to improve their learning experience. Below are some suggestions for optimizing your course materials for students both using the app and accessing LMS from mobile devices.

Notifications and messages

Encourage your students to enable mobile notifications so they are alerted about calendar events, forum posts, messages, assignment submissions and so on. Find out more in Mobile app notifications.

You can also enable mobile notifications for all the users by default via the Messaging settings default message outputs. Students can disable Mobile notifications within the app.

Provide a ‘how to’ guide to LMS on the mobile

Consider offering your students a guide (as a PDF or a page resource) on how to access your course on the app, what they can do and not (yet) do from the app. Read up on the what’s  New for mobile.

Setting up your course

  • Topics or weekly course format is best suited to mobile devices.
  • Don’t use orphaned activities or direct links to activities (the links will work but is not the best experience for mobile).
  • Site or course blocks are not displayed in the Mobile app, avoid putting important information in blocks.

Course content

  • Use responsive HTML in pages or mini-sites.
  • Try to use a page resource instead of downloadable documents where possible.
  • Avoid uploading many documents or having numerous, text-heavy pages. Think more in terms of short “information-bytes”.
  • If you include YouTube videos, provide them also for download and offline viewing in a folder. Not all video formats are supported so add them in different formats. (MP4 is probably the most widely accepted format.)
  • Drag and drop questions behave differently in the app. You can’t drag images, you need to tap to select and tap to drop.
  • Note that if you add YouTube video links or map links as URL resources, they will open automatically in the app.
  • Use only plugins which provide support so they can be accessed via the mobile app.
  • If you want to include large audio files in your course, please consider to include them embedded in a label or HTML page content instead as a file. The reason is that embedded files will play even if the screen is locked but files won’t play with the screen locked.

Media download for offline usage

To enable media files, such as video, to be downloaded

  • The file must be uploaded to the course, rather than being linked to (from YouTube, Vimeo etc)
  • The file must be small – less than 2MB for 3G users or less than 20MB for WiFi users

When a page containing the video is viewed (without playing the video), the file will then be downloaded.

Offline activities

All the supported activities work offline, although some require specific settings like the quiz module.

Things to avoid

Some activities are not yet fully supported by the mobile app, so find alternatives.

Mobile device considerations

The app works better on devices running

  • Android 4.4 onwards
  • iOs 6 onwards

In old devices, you may find problems related to:

  • User interface
  • Connection problems (specifically when connecting to sites using https certificates)
  • Slowness

The first version of the app was supported in Windows Phone and Windows 7. This version is not supported anymore and it was withdrawn from the Windows Store. Its usage is not advised.

Links to open the LMS Mobile app

If required, links which open the LMS Mobile app may be provided in the course (for users browsing the site using a mobile device with the app installed).

Links are of the form

lmsmobile://link=https://yourlmssite.org/mod/...

For example, the link

lmsmobile://link=https://mysite.es/mod/choice/view.php?id=8

will open the mobile app and display a choice activity.

Mobile app notifications

For users and instructors

The LMS mobile app lets you keep up to date with all that’s happening in your courses and on the site. Every time you open the app, events are synchronized with the main website.

You will receive LMS calendar event notifications automatically. If you don’t want to get them, you can turn them all off individually (or globally) in the Calendar events options in the main menu.

You will also receive notifications of messages, forum posts, submitted assignments etc (known as ‘push notifications’) if your site administrator has enabled these. To receive these notifications you need to enable them for your mobile on the app via Settings -> Notifications or on the main site, from the user menu top right >Preferences>Messaging.

For administrators

Push notifications can be enabled by an administrator by connecting their LMS site to a messaging server. An access key can be obtained via Administration > Site administration > Plugins > Message outputs > Mobile Notifications.

You can enable by default Mobile notifications for your users, please read the “Default message outputs” section in Messaging settings.

Users then need to connect at least once with the latest version of the LMS Mobile app in order to register their phones with the LMS site.

Event Reminders plugin

Push notifications can also include calendar event notifications.

The Event Reminders plugin will automatically send reminders for LMS calendar events in a timely manner via LMS message interface. It also allows users to control how they receive messages for each type of event in the LMS calendar.

Choice Results

Choice Results

Jump to: navigation, search

Many teachers and lecturers use clickers and student response systems to add a level of real-time interaction during a lecture or presentation. LMS has a inbuilt poll activity called choice which can be set up to allow students select one of a number of options. With so many students having mobile devices, this facilitates the teacher to have the students take the choice activity either using the mobile web interface of LMS, or using the LMS Mobile App.

This guide takes you through setting up a LMS web service to view live choice results in a real time dynamic graph – so replacing the clicker requirement and using the students’ own mobile devices instead.

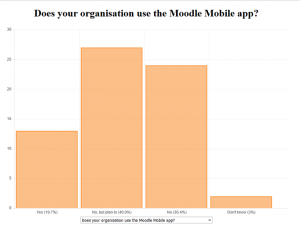
Example of choice results view

Initial set up

You will need to configure the following components for this, as follows:

  1. Configurations for your LMS site
  2. A separate PHP script page which calls your LMS site via LMS web services
  3. A chartjs (or similar online graphing application) installation for displaying the choice results in visual graphs online

LMS site configurations

1) Ensure your site is ready for web services:
This is at Site administration -> Advanced features where you need to enable and save the “Enable web services” setting

Enabling web services

2) Ensure your site is ready for web services protocols
This is at Site administration -> Plugins -> Web services -> Manage protocols where you need to enable and save either of the protocols you wish to use (for this guide, we will be using the REST protocol)

Enabling REST protocol

3) Ensure your site settings are ready for mobile access, thus allowing choice submissions from users via mobile devices
This is at Site administration -> Plugins -> Web services -> Mobile where you need to enable and save “Enable web services for mobile devices”

Enabling mobile access

4) Add a new user – call them “Choice View User” or something similar.
See Managing accounts for further details on this operation.

5) Add a new role – call it “Choice WS Role” or something similar.
This is at Site administration -> Users -> Permissions -> Define roles.
On the first Adding a new role page, leave “Use role or archetype” set at “No role” and click on Continue
For Context types where this role may be assigned – assign to System

Add custom role

In capabilities – filter for the word service – click on Allow for Web service: REST protocol, or whichever protocol you’re using

Add capability

Finally click on “Create this role”
See Creating custom roles for further details on this operation.

6) Assign your new user to the new role.
This is at Site administration -> Users -> Permissions -> Assign system roles.
Click on your new role
Search for your new user (you may need to filter by the user name)
Select your user in the list and click on Add to assign the user to the role

Assign role

When you reload the Assign system roles page, your new user should be listed in the Users with role column for the role.

7) Create the web service to be called for the choice results
This is at Site administration -> Plugins -> Web services -> External services
Add the web service, call it Choice View or something similar, click on Enabled, click on Authorised users only and finally click on Add Service.

Add web service

Next, add two functions to the web service, by searching for the Choice functions (you may need to filter by the word choice):
– mod_choice_get_choice_results
– mod_choice_get_choices_by_courses

Add functions

8) Add your new user to the web service Authorised users list
This is at Site administration -> Plugins -> Web services -> External services
To add authorised users, click on the Authorised users link for your Choice View web service, this is similar to the interface where you assigned your user to the Choice View role.
Search for your new user (you may need to filter by the user name)
Select your user in the list and click on Add to assign the user to the Authorised users list

9) Create a web service token to authenticate the expected HTTP(S) requests
This is at Site administration -> Plugins -> Web services -> Manage tokens
Click on Add
Search for the user you created for the Choice View
In the Service dropdown, select the Choice View service you also just created
Add an IP restriction if needed
Add a time restriction if needed
Click on Save changes and copy the resulting token

Add token

10) Enrol your new user, “Choice View User”, as a teacher in all courses from where you want to access the choice activities. This is needed so that the web service will be able to access the choice activity details using your user’s token.

PHP script page for displaying results

This page will access your LMS site choice activities and display their results with visual graphs.
Copy our sample PHP script code to wherever you want it hosted and called from.
It will need http or https access to your LMS site where the choice activities are hosted.
It will also need to have some level of security if it’s going to be a publicly accessible URL as the PHP script itself contains details of a REST web service login with access to your LMS site. We would suggest a htaccess login or similar.
Edit and save the sample PHP script code to add your LMS site URL and Choice View token values to where the code states “<yourURL>” and “<yourtoken>” respectively.

Code configuration

The script code will also need access to an installation of chartjs, or other graphing application, in order to display the graphs, please see http://www.chartjs.org/ for more details. You will then also need to edit the script code to add the server directory location of your chartjs installation to where the code states “<yourchartjslocation>”.

To reveal the results, just type in the URL of your PHP script code into your browser.

The web service will now display all course accessible choice activities in the page dropdown, displaying the one which was first created initially. If you know the choice id from the database already, you can instead add the parameter to the URL as follows: “?choiceid=X”.

One final point, the sample PHP script code is set with a simple reload of the page every 5 seconds so that the displayed graph updates with the latest results regularly. This reload could be more elegantly processed if needed, using AJAX for instance.


Sample Code

<?php
 
$url="<yourURL>";
$function="mod_choice_get_choice_results";
$function2="mod_choice_get_choices_by_courses";
$token="<yourtoken>";
 
// Grabs choice details including title
$ch2 = curl_init();
curl_setopt($ch2, CURLOPT_URL, "$url/webservice/rest/server.php?wsfunction=$function2&wstoken=$token&lmswsrestformat=json");
curl_setopt($ch2, CURLOPT_RETURNTRANSFER, 1);
$result2 = json_decode(curl_exec($ch2));
 
if (isset($_REQUEST['choiceid'])) {
    $choiceid=intval($_REQUEST['choiceid']);
} else if (count($result2->choices) > 0) { // accessible choices found
    $choiceid=intval($result2->choices[0]->id);
} else {
    $choiceid = 0; // default value
}
if ($choiceid < 1) {
    echo("invalid id");
}
$colour="249,128,18"; // LMS orange, change as required.
 
$ch = curl_init();
curl_setopt($ch, CURLOPT_URL, "$url/webservice/rest/server.php?wsfunction=$function&wstoken=$token&choiceid=$choiceid&lmswsrestformat=json");
curl_setopt($ch, CURLOPT_RETURNTRANSFER, 1);
$result = json_decode(curl_exec($ch));
 
$graph_title = "";
$dropdown = "<select name='choiceid' onchange='this.form.submit()'>n";
$dropdown .= "<option value='0'>Select</option>n";
 
foreach ($result2->choices as $choice) {
    $dropdown .= "<option value='{$choice->id}'";
    if ($choice->id == $choiceid) {
        $graph_title = $choice->name;
        $dropdown .= " selected";
    }
    $dropdown .= ">{$choice->name}</option>n";
}
$dropdown .= "</select>n";
 
// data for bar graph
$chart = new stdClass();
$data = array();
$labels = array();
foreach ($result->options as $a) {
    $data[] = $a->numberofuser;
    $labels[] = $a->text." (".round($a->percentageamount,1)."%)";
}
$chart->labels = $labels;
$dataset = new stdClass();
$dataset->data = $data;
$dataset->fillColor = "rgba({$colour},0.5)";
$dataset->strokeColor = "rgba({$colour},0.8)";
$dataset->highlightFill = "rgba({$colour},0.75)";
$dataset->highlightStroke = "rgba({$colour},1)";
$chart->datasets = array($dataset);
 
curl_close($ch);
 
?>
<!doctype html>
<html>
        <head>
                <meta http-equiv="refresh" content="5" >
                <title>Bar Chart</title>
                <script src="<yourchartjslocation>"></script>
        </head>
        <body>
        <center>
        <h1><?php echo($graph_title); ?></h1>
                <div id="canvas-holder">
                        <canvas id="chart-area" width="900" height="600"/>
                </div>
 
            <form><?php echo($dropdown); ?><noscript><input type="submit" value="Submit"></noscript></form>
 
        <script>
            var pieData = <?php echo json_encode($chart); ?>;
 
                        window.onload = function(){
                                var ctx = document.getElementById('chart-area').getContext('2d');
                                window.myPie = new Chart(ctx).Bar(pieData, {animationSteps : 1, responsive: false});
                        };
		</script>
        </center>
        </body>
</html>

Mobile web services

LMS comes with a built-in web service designed for mobile applications. It is required to run the official Mobile app. Enable it only if you want people to use the official app or if a third party app explicitly requires it.

Enabling mobile web services

A site administrator first must enable mobile web services:

  • In Administration > Site administration > Mobile app > Mobile settings
  • Check “Enable web services for mobile devices” and then
  • Click Save.

That’s it! No other steps required.

The rest of this document explains the “behind the scenes”.

What happens when the service is enabled

Enabling the mobile web services will automatically:

  • enable the web services system (Administration > Site administration > Advanced features)
  • enable the built-in external service called ‘Mobile web services’ – you should see this new mobile service listed as enabled
  • enable the xml-rpc protocol (for backward compatibility with unmaintained My LMS app)
  • enable the rest protocol
  • allow the ‘webservice/xmlrpc:use’ capability for the authenticated user role
  • allow the ‘webservice/rest:use’ capability for the authenticated user role

Disabling mobile web services

When you uncheck ‘Enable mobile web services’, it will automatically:

  • disable the external service called ‘Mobile web services’.
  • if ‘Mobile web services’ was the only external service enabled:
    • disable the web services system
    • disable the xml-rpc protocol
    • disable the rest protocol
    • remove the ‘webservice/xmlrpc:use’ capability for authenticated user role
    • remove the ‘webservice/rest:use’ capability for the authenticated user role