Video Activity, allows you to add video content to a course. Video activity feature is a very powerful tool which allows the user’s to improve their language skills, catch up on lectures they have missed, improve their sales and marketing strategies. The tool helps user’s to gain knowledge in a lucrative manner. This feature also has an option for disabling the navigation bar so that users do not skip forward through any videos. The progress bar too can be shown for users.
Contents
Setting up a Video Activity
Once the activity is added, you can proceed to set up the course with the settings you need for it. You will find:
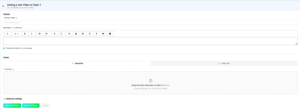
General
- Name: Required field to put the name of the activity.
- Description: This step is optional.
- Upload video: Once this option is clicked, a new window will pop up. You will have the option to choose from upload a file.
- When choosing “Upload a file”, click the “choose file” button. Keep in mind the video you choose needs to be on MP4 format.
- Once added, the name of the file will show up beside the “choose file” button. You can also choose the name you want the file show up by typing it on the “save as” field; choose the author and the video license.
- You can enter video url, but video url should be either youtube url or vimeo url
- When finished, click on Upload this file to end.
Linking to a video online elsewhere:
If your video is hosted elsewhere online (such as YouTube or Vimeo) you can simply link to the relevant page by choosing URL from ‘Add an activity or resource’ and pasting in the relevant link as seen above.
Note that, in an establishment where certain video sharing sites might be banned, your students might not be able to access your video.
Note: This activity will allow you to show a Youtube or Vimeo videos only by copying the URL on the specified field.
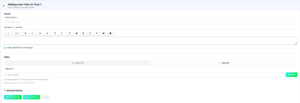
Video
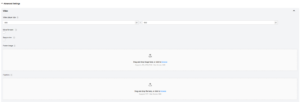
- Width: Choose the width of the video
- Height: Choose the height of the video
- Allowed to move forward: You can choose between allowing or not to let the users move forward on the video.
- “Responsive?” checkbox: If checked, the video will resize automatically with the browser window size
- Poster image and Captions: Choose an image for poster and add caption file in the format .vtt
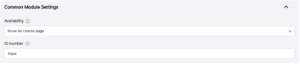
Common module settings
- Availability: Depending on if you choose “show” or “hide” the users/students will have the option to see this video.
- ID Number: Helps to identify the activity for grade calculation purposes.
Restrict access
Here, you can add the necessary restrictions for the users to get to this activity, i.e if the user needs to complete another activity before visualizing this video, or if they cannot access before and specific date you set up.
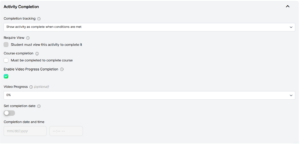
Activity completion
- Completion tracking: specifies how will this activity will be marked as completed if needed.
- Require view: If checked, students must view this activity to complete it.
- Video Progress: This option will be enabled to be checked when the option “Show activity as complete when conditions are met” is chosen from the completion tracking.
- Expect Completed on: This setting specifies the date when the activity is expected to be completed.
Tags
Here, you can include any tags related to the topic that you want to show in the video or the course the video is in. You can use tags already created or create new ones, according to you and your users’ needs.
Competencies
From the competencies that are assigned to the course in which you are including the video activity, you can choose the competencies related to this particular activity, as well as what’s going to happen with those competencies once the activity is done, as attach evidence or send for review.