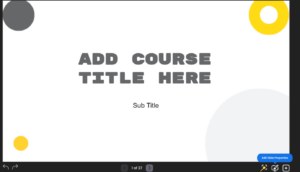
Once the course is generated, At the bottom right corner of the slide, you’ll find the “Edit Slide Property” option. Click on it, and the slide edit properties will appear in the right-hand panel.
In the right drawer, you’ll see the Logo section, followed by the Transition and Background drop-downs. Each of these has its own set of editing properties underneath.
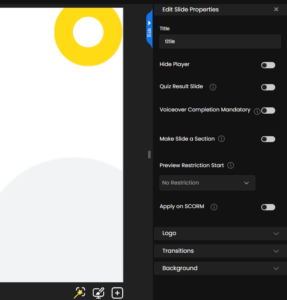
You can also have the toggle options to hide player, Quiz Result slide, Voiceover completion mandatory.
- In voice over completion mandatory means, you can make it compulsory to complete the voice over of that particular slide, so that the learner can move to the next slide.
- To make a slide as a section / module, you can toggle on the make slide a section.
- You can even apply restriction on the preview from any particular slide by choose them from the drop down.
You can expand the Logo panel, you’ll have the option to upload a logo. Simply click on “Upload,” and an upload window will appear.

Now, you have the option to search for any of your logos from the media library, which offers a variety of options. In the “Upload Image” section, you can choose a file from your folder. Additionally, there’s a search option that lets you find the image you desire, as well as a “Text to Image” feature, where you can describe the image, and it will be generated accordingly.
You have the flexibility to position your logo on the slide according to your preference. Options such as top-left, top-right, bottom-left, bottom-right, and center allow you to precisely align the logo, ensuring it appears exactly where you want it on the slide for optimal visual impact. You also have the option to adjust the size of your logo and control the opacity, giving you the flexibility to make the logo more subtle or more prominent, depending on your design needs.
Even the logo’s can be removed by just simply click on “Remove,” and a pop-up will appear asking for your confirmation. Click on “Delete,” and the logo you uploaded will be removed from the slide.

Next in the transitions drop-down, you’ll find a variety of methods to choose. Transitions define how one slide smoothly switches to the next, adding a dynamic visual effect to enhance the flow of your presentation. You can also adjust the duration to control how quickly or slowly the transition appears on your screen. Additionally, there’s a toggle option that lets you decide whether to apply the transition to just this specific slide or to all the slides in your course.
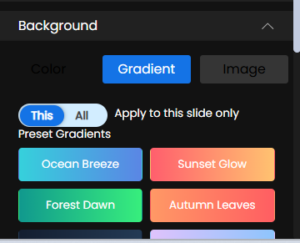
In the Background drop-down, which offers options: Color, Gradient, and Image. Starting with Color, you have a wide range of color options to choose from. As with transitions, you can toggle the option to apply the background color to just this specific slide or to the entire course. For the Gradient option, you have pre-set gradient styles to choose from. Additionally, there are two options to customize your own gradient, allowing you to pick specific colors and create your unique gradient variant. You can also control the direction of the gradient. Furthermore, there’s an option to adjust the opacity of your gradient, giving you full control over its appearance and blending with other elements on your slide.
For the background Image option, you can search for an image, either from your media library or an external source. Also, you can upload an image directly from your media folder. If you wish to change the image, you also have the option to remove the current image applied to your slide. Additionally, you can adjust the opacity of the image, allowing you to fine-tune how prominent or subtle the image appears on your slide.