Contents
About Manage User Page
- An admin can perform various operations related to the user accounts on the Manage User Page.
- The page will display all users created in the system, per page it will show 10 records by default.
- Admin can Add, Edit, Update, & Delete the user on this page, even admin can suspend the user account or activate.
- Admin can able to see all the Multitenant user records by applying the filter, as per requirement admin can also check the multitenant name by selecting the ‘Show Multitenant records’ check box.
For the manage people page, we need to follow the below steps
- Click on the Users menu from the left navigation menu.
Under this section, select the Manage Users submenu.
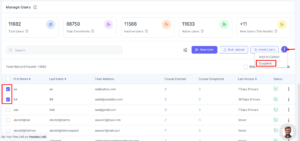
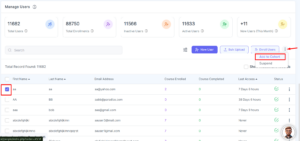
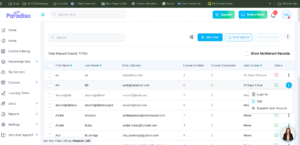
User Statistics Overview
The User Statistics module provides key insights into user activity and engagement within the LMS.
Below are the metrics displayed and their descriptions:
1. Total Users
-
Description: Displays the total number of users registered in the system.
-
Data Source / Logic: Count of all active and inactive users from the user table.
2. Total Enrollments
-
Description: Shows the total number of course enrollments across all users.
-
Data Source / Logic: Count of all user–course enrollments.
3. Inactive Users
-
Description: Displays users who have not logged in during the last 90 days or are suspended.
-
Data Source / Logic: Users with
lastaccess > 90 daysorsuspended = 1.
4. Active Users
-
Description: Shows users who have logged in recently or completed at least one learning activity.
-
Data Source / Logic: Users with
lastaccess ≤ 90 daysor who have completion data.
5. New Users (This Month)
-
Description: Displays the total number of users created in the current month.
-
Data Source / Logic: Users where
timecreatedfalls within the current month.
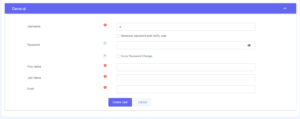
Adding Users:
There are two ways a user can create in the system as follow:
- If there is SSO installed in the system on clicking on the SSO icon from the login page user will get created in the LMS if the user does not exist in the system and the user will be listed in the manage people page.

- Admin can create a new user by clicking on the ‘New user’ button from the page.
Suspend the users:
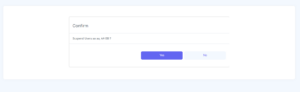
- Admin can suspend many users by selecting the checkbox from the list and clicking on the ‘Suspend’ button from the top.
- While suspending the user, Admin needs to give approval on the pop-up to proceed.
- Admin can suspend specific users as well by clicking on the ‘Three dots’ in front of the user.
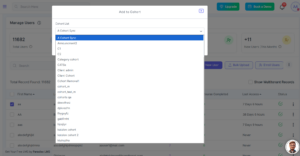
Add to Cohort
- Admin can add the user into the cohort by selecting the user from the list and clicking on the ‘Add to Cohort’ button from the top menu.
- Add to Cohort’ will show all the cohorts available in the system, by clicking on it the user will add to the respective cohort.
Searching users:
- Admin can able to search a specific user by entering a username, first name, last name in the search box.

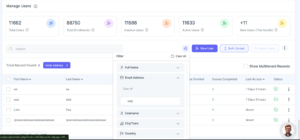
Searching users with filters:
- Admin can search users with different filters like by its email, full name, city, country, role, and so on.
- Admin can filter the multitenant user records by applying the ‘Entire LMS Peoples’ filter, in this filter, it will list all the available tenants in the LMS.
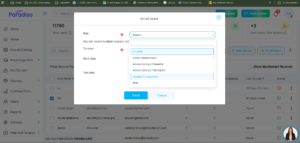
Enroll user into the course:
- Admin can able to add users to the course by selecting the user and clicking on the ‘Enroll’ button from the enabled option from the top menu.

- Select the user from the list and click on the ‘Enroll user’ button then the admin can able to search for a course in which the admin wants to enroll.
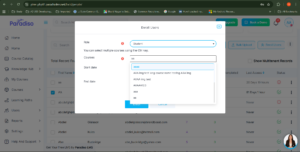
- Admin can give the course-level roles to the user while enrolling.
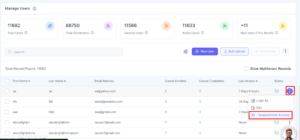
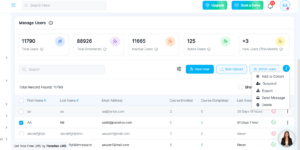
Different Actions on the user:
- Admin can able to Delete the specific user or can delete multiple users at a time by selecting the user and clicking on the delete option from the dropdown menu.
- Admin can able to upload the bulk user via CSV by clicking on the upload option.
- Admin can able to send a broadcast message to all selected users or can send a message to a specific user by clicking on send message button from the dropdown menu.
- Admin users can enable the suspended user by clicking the ‘Enable’ option from the dropdown menu.
- Admin can able to export the selected user from the list by clicking on the export button from the dropdown menu.
Actions on the user:
- Admin can able to do operations with particular users as ‘Login as’, ‘Edit’, ‘Suspend user account’ by clicking on the three dots in front of user record.
- Admin can able to log in as a user by clicking on the ‘Login as’ option.
- Admin can able ‘Edit’ the user information by clicking on the ‘Edit’ option.
- Admin can able ‘Suspend’ the user by clicking on the ‘Suspend’ option.