- Lesson settings
- Building Lesson
- Using Lesson
- Lesson FAQ
Contents
1 Lesson administration settings
1.1.4 Minimum grade to display menu
1.1.4.2 Maximum Number of Answers
1.2.3.1 Password protected lesson
1.2.3.2 Allow lesson to be attempted offline
1.3.2 Provide option to try a question again
1.3.3 Maximum Number of Attempts
1.3.4.1 Action after a Correct Answer
1.3.4.2 Number of pages to show
Lesson administration settings
This page explains the settings involved when first creating a lesson.
To add a lesson to your LMS course page:
- With the “customize this page” turned on, in the section you wish to add your lesson, click the “Add an activity or resource” link (or, if not present, the “Add an activity” drop-down menu) and choose Lesson.
- In the General section, give your lesson a name, a description if needed, and tick the box if you wish that description displayed on the course page.
Appearance
Progress bar
Choose this to show a bar at the bottom of the page showing how far into the lesson the user has got.
- For lessons containing only Content pages, once a lesson has been taken to the end, if that same lesson is re-taken, the progress bar will not be “reset”, i.e. it will show a 100% progress from page 1!
- For lessons containing Question pages and set to “Re-take” Yes, the progress bar is always “reset” at 0% upon re-take.
- Note that the Lesson Progress bar only works correctly for lessons with a “straightforward” navigation, such as page 1 -> page 2 -> page n -> end of the lesson. It is not guaranteed to work with pages “jumping all over the place”.
Choose this when you want to show a list of the content page titles in the Lesson to the user. Only those pages which have “Display in the menu?” checked will display. The menu will not display question pages.
Show more
Depending on the what the administrator has specified as ‘Advanced’, other settings will be displayed by clicking a ‘Show more’ link:
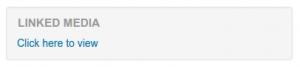
Linked media
Link to pop-up
If you want to include a link to a media file for users to refer to, upload it here. A ‘Click here to view’ link will be displayed in a block called ‘Linked media’ on each page of the lesson.
The width and height of the pop-up window may be set by an admin in Settings > Plugins > Activity modules > Lesson.
Display ongoing score
Choose this to let users see their score as they work through the lesson.
Choose this if you want the user to go through the lesson once and get a grade before they can (on review) see and navigate through all the different pages.
Slideshow
Slideshow height, width, and background color are set for the whole site by an administrator in Site administration > Plugins > Activity modules > Lesson.
Maximum Number of Answers
Here you can set the default number of selection boxes available when you add or edit a question or content page. For instance, if you are only going to use Multiple Choice questions with 3 answers in your lesson, you might select 3. You can change the default here at any time to display more or less question answers or content choices.
- Note: This only impacts the editing screen. Changing from 4 to 2 will not remove or hide any answers previously entered from the user.
Use default feedback
Every LMS site has a standard response (feedback) when a user selects a correct or wrong answer in a lesson. Select “No” if you only what you put as a response for a specific question’s answer to display. In this case, when you leave the response to a question blank, the user will not see any comment about their answer. The typical LMS standard responses are: “That’s the correct answer” or “That’s the wrong answer”.
Link to the next activity
Choose this to give users a link to another activity when they reach the end of the lesson.
Availability
Available from/Deadline
Here you can set a start and end date and time for your Lesson.
Time limit
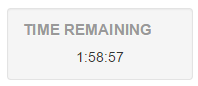
This allows you to set a time limit on the lesson which can now be seconds, minutes, hours, days or weeks. Users will see a countdown counter in a block as they work. (Note that this does not work if the lesson is downloaded for offline use via the mobile app.)
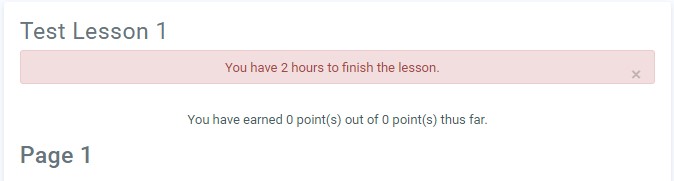
The timer does not stop them doing the lesson when the time is up, but correct answers are no longer scored.
Show more
Depending on the what the administrator has specified as ‘Advanced’, other settings will be displayed by clicking a ‘Show more’ link:
Password protected lesson
- Change to “Yes” and enter the password if you want users only to access it when they know the password.
Allow lesson to be attempted offline
Enabling this setting means the lesson can be downloaded and done offline by a mobile app user. Lessons which are timed may not be attempted offline.
Flow control
Allow Student Review
This puts a “Review Lesson” button on the last screen of the lesson to encourage the users to navigate through the lesson again. If the lesson contains questions then the review will start from the first question, otherwise, the review will start from the first content page.
- Note that the users will not be able to change their answers, only view them.
Provide option to try a question again
- This displays a button after an incorrectly answered question so that the user can try again (but not get credit for it). If the user clicks to move on to another question then the selected (wrong) answer jump will be followed. By default, wrong answer jumps are set to “this page”, so it is recommended that you set the wrong answer to jump to a different page to avoid confusion with your users.
- TIP: Leave this off if you are using essay questions.
Maximum Number of Attempts
- Decide here how many times you want users to be able to attempt each question. When they reach the maximum, they will be taken automatically to the next page.
Note: this setting works in combination with the above setting, or independently.
- When ‘provide an option to try again’ is set to No, users will be able to retake the question as many times as it is set here, with a score penalty.
- When ‘provide an option to try again’ is set to Yes, then users will be able to retake the question as many times as it set here without a score penalty. In this case, an extra dialogue appears.
Consequently when the relevant jump ‘this page’ is used in the wrong answer while the ‘provide an option to try again’ is set to No and ‘maximum number of attempts’ is set to 1, a user that will answer wrongly will be moved into the next page, since he/she has the change to try the question just once.
Tip: Ensure you check lesson using a real user account, as the instructor preview or the ‘switch role to student’ may not give you the exact picture.
Show more
Depending on the what the administrator has specified as ‘Advanced’, other settings will be displayed by clicking a ‘Show more’ link:
Action after a Correct Answer
Choose here where you want a user to be sent to if they get a question right. See Using Lesson for more details on this setting. The options are:
-
- the next part of the Lesson (default setting)
- a random, unexpected page
- a random page which they have not yet answered.
Number of pages to show
You only need this if you have set “Action after a correct answer” to show an unseen or unanswered page. Otherwise, all pages will be seen
Grade
Set a grade and grade category here, along with a “Grade to pass” which may be connected with Activity completion and Restrict access such that a user will not be able to access a follow-up activity until they have obtained the required grade in the lesson.
Practice lesson
Practice lessons are now saved; this means they will appear in the reports. You must enable the “Retakes allowed” setting if you want users to be able to attempt a practice lesson several times.
Note: If you are upgrading from an earlier version, be aware that all practice lessons will have ” Re-takes allowed” set to “Yes”. If you are restoring a practice lesson made before this change, you may need to modify the “Re-takes allowed” setting if needed.
Custom Scoring
Use this to give a particular number score (negative or positive) to each answer
Re-takes allowed
Choose this if you want your users to be able to do the lesson more than once.
- Note that this setting only applies to lessons containing Question pages. Lessons consisting only of Content pages can be re-taken even if ‘Re-takes allowed’ is set to No.
Show more
Depending on the what the administrator has specified as ‘Advanced’, other settings will be displayed by clicking a ‘Show more’ link:
Handling of re-takes
If you allow your users to re-take the lesson, then decide here if the grade for all lesson attempts is the mean or the maximum.
- Note that the Question Analysis always uses the answers from the first tries of the lesson. Re-takes by users are ignored.
Minimum Number of Questions
Set the minimum number of questions that will be used to calculate a user’s score. Users will be told how many they have answered and how many more they need to answer.
- If you are using Content pages, then set this to 0.
- If you use this setting, then add some explanatory text at the start of the lesson so the user knows the minimum number of questions they must answer to receive a grade.
Common module settings
Access restrictions
Restrict access must be turned on in the site settings for this to appear.
(These settings are collapsed by default)
- Grade – limit to overall grade or specific grade on another activity
- Group – limit to specific group
- Groupings – limit to specific groupings
- User profile – limit based upon user profile fields
- Restriction set – nest restrictions
Activity completion
Activity completion must be turned on in the site settings for this to appear.
(These settings are collapsed by default)
- Completion tracking – 3 options
- Required view
- Required grade
- Required end reached
- Required time spent
- Expected completion on
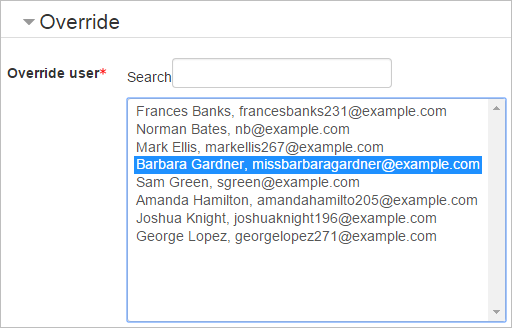
User and group overrides
When a lesson has been created, it is possible to override certain settings for individuals and groups from Lesson administration. In situations where two group overrides may apply to a single user, the most lenient date is used. For “Available from” dates, this means the earliest possible date is used, for “Deadline” dates, this means that the latest possible date is used. Note also that if there exists a user override for a user, it will always take precedence over any group overrides.
It is possible to override passwords, availability/deadline, time limits and question retries and lesson retakes.
Selecting one of the options, for example, ‘User’ will display a button to click. From the next screen you can choose the user or group to override and the settings you wish to override:
When the override is saved, it is displayed on a screen along with any other overrides previously set.
Site administration settings
- The administrator can change the lesson’s default settings and decide which lesson features to display to instructors in courses, and which features are ‘Advanced’.
- Features which have the ‘Advanced’ box ticked only display when instructors click a ‘Show more’ link.
- This is useful for simplifying the lesson for instructors when it is first set up.
- The lesson settings can be reviewed from Settings > Plugins > Activity modules > Lesson.