The Policies plugin provides a new user sign-on process, with the ability to define multiple policies (site, privacy, third party), track user consents, and manage updates and versioning of the policies.
The Policies plugin forms part of LMS’s privacy feature set and will assist sites to become GDPR compliant.
Contents
1 Enabling the policies plugin
2 Adding and managing policies
5.1 Sites with minors as the majority of users
5.2 Sites with only a few minors
7 Giving consent on behalf of other users
7.1 Giving consent on behalf of multiple users
Enabling the policies plugin
After installing the policies plugin, it may be enabled as follows:
- Go to Settings > Users > Privacy and policies > Policy Settings
- Set the Site policy handler to ‘Policies (tool_policy)’.
- Save changes.
Two new pages will then appear in the Site administration – ‘Manage policies’ and ‘User agreements’.
Note that when Policies is set as the site policy handler, the settings ‘Site policy’ and ‘Site policy for guests’ are ignored.
Adding and managing policies
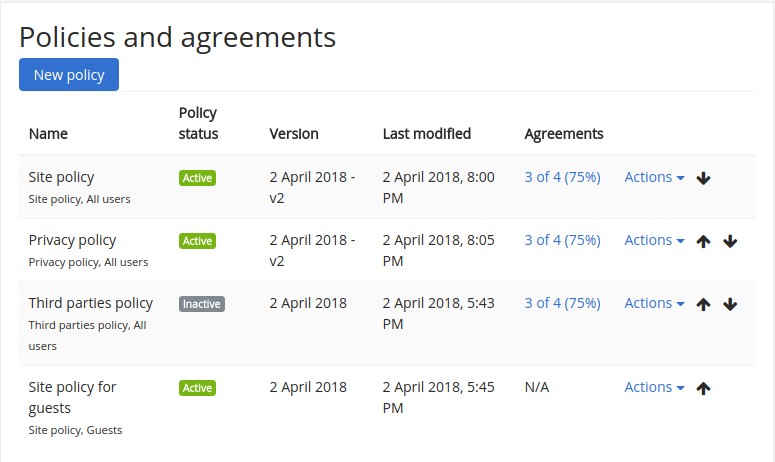
An admin or any user with the Manage policies capability (by default manager) can access the page ‘Manage policies’ in the Site administration and:
- Add a new site/privacy / third parties / other policy for all users, authenticated users or guests
- Change the active/inactive status of each policy
- View the number and percentage of users who have agreed to each policy
- Edit a policy and specify whether it is a minor change (not requiring users to reconfirm their consent) or not
- View the current version of each policy and also previous versions
- Change the order in which policies are shown to users
To add a new policy:
- Go to ‘Manage policies’ in the Site administration.
- Click the button ‘New policy’
- Complete the form and save changes.
Note that once created, a policy can be edited, or set to inactive, but if users have agreed to it, it can’t be deleted.
Giving consent to policies
Giving consent to policies
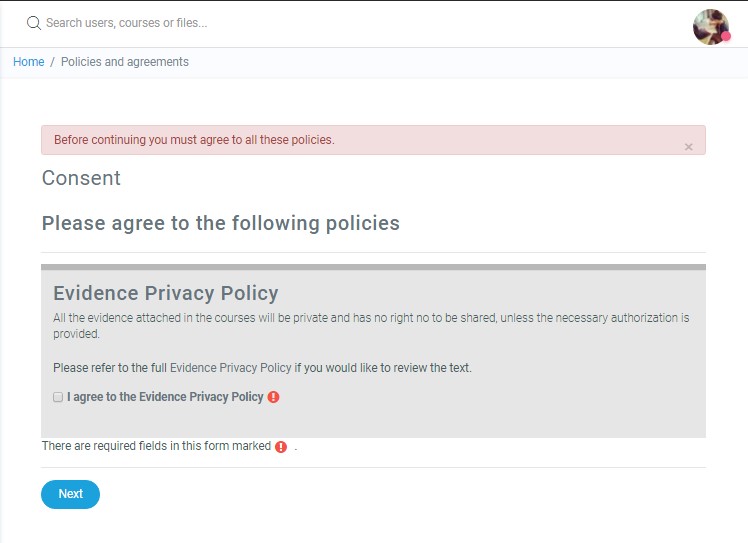
All users (with the exception of admins) will be required to give their consent to all policies defined either for “Authenticated users” or for “All users” before proceeding further on the site.
If a new policy is added, all users will be required to give their consent when they next log in. Similarly, if an existing policy is edited and is not marked as a minor change, all users will be required to give their consent when they next log in.
If self-registration is enabled on the site, new users will be required to give their consent to all policies before proceeding to the sign-up form. If the digital age of consent verification is enabled in ‘Privacy settings‘ in the Site administration, when a new user clicks the ‘Create new account’ button, they will be prompted to enter their age and country. If the user’s age is lower than the age of consent for their country, they will see a message prompting them to ask their parent/guardian to contact the support contact (as specified in ‘Support contact’ in the Site administration).
Policies for guests

Policies for guests modal window
If a user logs in as a guest, a modal window will be shown at the bottom of the user’s browser window with links to all policies defined either for guests or for all users.
Minors
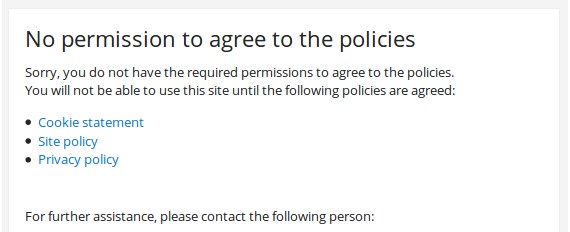
Minor prevented from proceeding further on the site
Users who are younger than the age of digital consent, called ‘minors’, may be prevented from giving their consent by prohibiting the capability Agree to policies. They will then be prevented from proceeding further on the site until someone can give consent on their behalf.
Sites with minors as the majority of users
To prohibit users from agreeing to policies because they are minor:
- Go to ‘Define roles’ in the Site administration.
- Edit the role of the authenticated user and set Agree to policies to prohibit.
- Save changes.
To enable instructors and other users who are not minors to agree to policies:
- Go to ‘Define roles’ in Settings > Users > Permissions.
- Click the button ‘Add a new role’.
- Give the role a name such as ‘Able to give consent’, short name and description.
- For context types where this role may be assigned, tick system.
- Enter policy in the filter box, then allow the capability to “Agree to policies”.
- Click the button ‘Create this role’.
- Go to ‘Assign system roles’ in the Site administration.
- Choose the ‘Able to give consent’ role to assign.
- Select instructors and other users in the Potentiausers’rs list, and use the left-facing arrow button to add them to the Existing user’s list.
Sites with only a few minors
To prohibit users from agreeing to policies because they are minor:
- Go to ‘Define roles’ in Settings > Users > Permissions.
- Click the button ‘Add a new role’.
- Give the role a name such as ‘Digital minor’, short name and description.
- For context types where this role may be assigned, tick system.
- Enter policy in the filter box, then prohibits the capability Agree to policies.
- Click the button ‘Create this role’.
- Go to ‘Assign system roles’ in the Site administration.
- Choose the ‘Digital minor’ role to assign.
- Select minors in the Potential user’s list, and use the left-facing arrow button to add them to the Existing user’s list.
User agreements
An admin or any user with the View user agreements report capability (by default manager) can access the page ‘User agreements’ in the Site administration and:
- View user consents
- Filter by policy, permission, status or role
- Give consent on behalf of minors
- Download table data
User agreements for a particular policy may also be viewed via the ‘Manage policies’ page by clicking the link in the Agreements column.
Giving consent on behalf of other users
An admin or any user with the capability Agree to the policies on someone else’s behalf can give consent on behalf of minors or when a written consent was obtained offline.
Giving consent on behalf of multiple users
Record of consents with remarks
Users with capability Agree to the policies on someone else’s behalf in the system context, such as managers, can give consent on behalf of multiple users as follows:
- Go to ‘User agreements’ in Settings > Users > Privacy and policies.
- If necessary, filter by ‘Permission: Can not agree’.
- To give consent to multiple policies, tick the box next to the selected users’ names then click the consent button.
- To give consent for a single policy, click the red cross next to the user’s name.
When giving consent on behalf of other users, there is an opportunity to add some remarks. Clicking on the link in the Overall column gives an overview with details of who gave consent and when, together with any remarks.
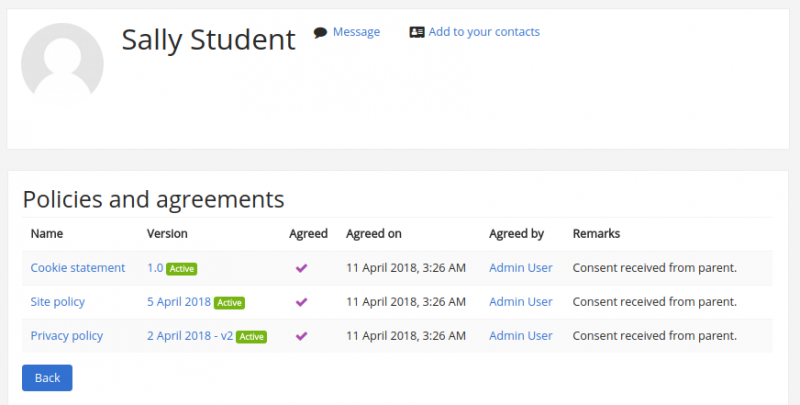
Giving consent on behalf of a child
A parent or guardian may be allowed to give consent on behalf of their child by giving them the capability Agree to the policies on someone else’s behalf in the user context. The parent or guardian will then be able to give consent as follows:
- Go to the child’s profile page.
- Click the link ‘Policies and agreements’.
- Click the red cross next to the policy name.
Capabilities
- Agree to policies (tool/policy:accept) – allowed for the authenticated user role
- Manage policies (tool/policy:managedocs) – allowed for default role of manager only
- Manage privacy settings (tool/policy:manageprivacy) – allowed for default role of manager only
- View user agreements reports (tool/policy:viewacceptances) – allowed for default role of manager only
- Agree to policies on someone else’s behalf(tool/policy:acceptbehalf) – allowed for default role of manager only
See also
- GDPR for administrators (+)